Friday, June 2, 2023

Providing feedback on the VS Code Python experience

My current role as a Python cloud advocate at Microsoft is to make sure Python developers have a great experience using Microsoft products, including my current favorite IDE, VS Code. As much as I love VS Code, it still has bugs (all software does!), so I often find myself filing issues. It can be a little tricky to figure out where to file issues, as there are multiple GitHub repos involved, so I'm writing this post to help others figure out what to post where.

github.com/microsoft/vscode
The primary VS Code repo. This is typically not the place for Python-specific issues, but if your feedback doesn't fit anywhere else, this might be where it goes, and the triagers can direct you elsewhere if needed.
github.com/orgs/community/discussions/categories/codespaces
Discussion forum for issues that seem specific to GitHub Codespaces (e.g. forwarded ports not opening).
github.com/microsoft/vscode-remote-release
Similarly, this is the repo for the VS Code Dev Containers extension, appropriate for issues that only happen when opening a project in a Dev Container locally.
github.com/devcontainers/images
The repo that generates the mcr.microsoft.com/devcontainers Docker images. If you're using a Dev Container with a Python image from that registry and think the issue stems from the image, report it here. Consult the README first, however.
github.com/microsoft/vscode-python
The repo for the Python extension that's responsible for much of the Python-specific experience. The extension does build upon various open-source projects, however. See below.
github.com/microsoft/pylance-release
The repo for the library that provides the linting/error reports in VS Code. When you get squiggles in your Python code in VS Code and hover over them, you should see in the popup whether the error comes from Pylance or a different extension. If you haven't installed any other extensions besides the Python one, then it's almost certainly from Pylance.
github.com/microsoft/debugpy
The repo for the library that provides part of the Python debugger experience in VS Code. For example, if it's not showing local variables correctly in the debug sidebar, that's an issue for debugpy.
github.com/microsoft/vscode-jupyter
The repo for the Jupyter extension that makes ipynb notebooks work well in VS Code. This extension used to be downloaded along with the Python extension but must now be installed separately. If it's a notebook-specific issue, it probably goes here.

Whenever you're filing an issue, be sure to provide as much information as possible. Thanks for helping us make the Python experience better!

Thursday, May 25, 2023

Streaming ChatGPT with server-sent events in Flask

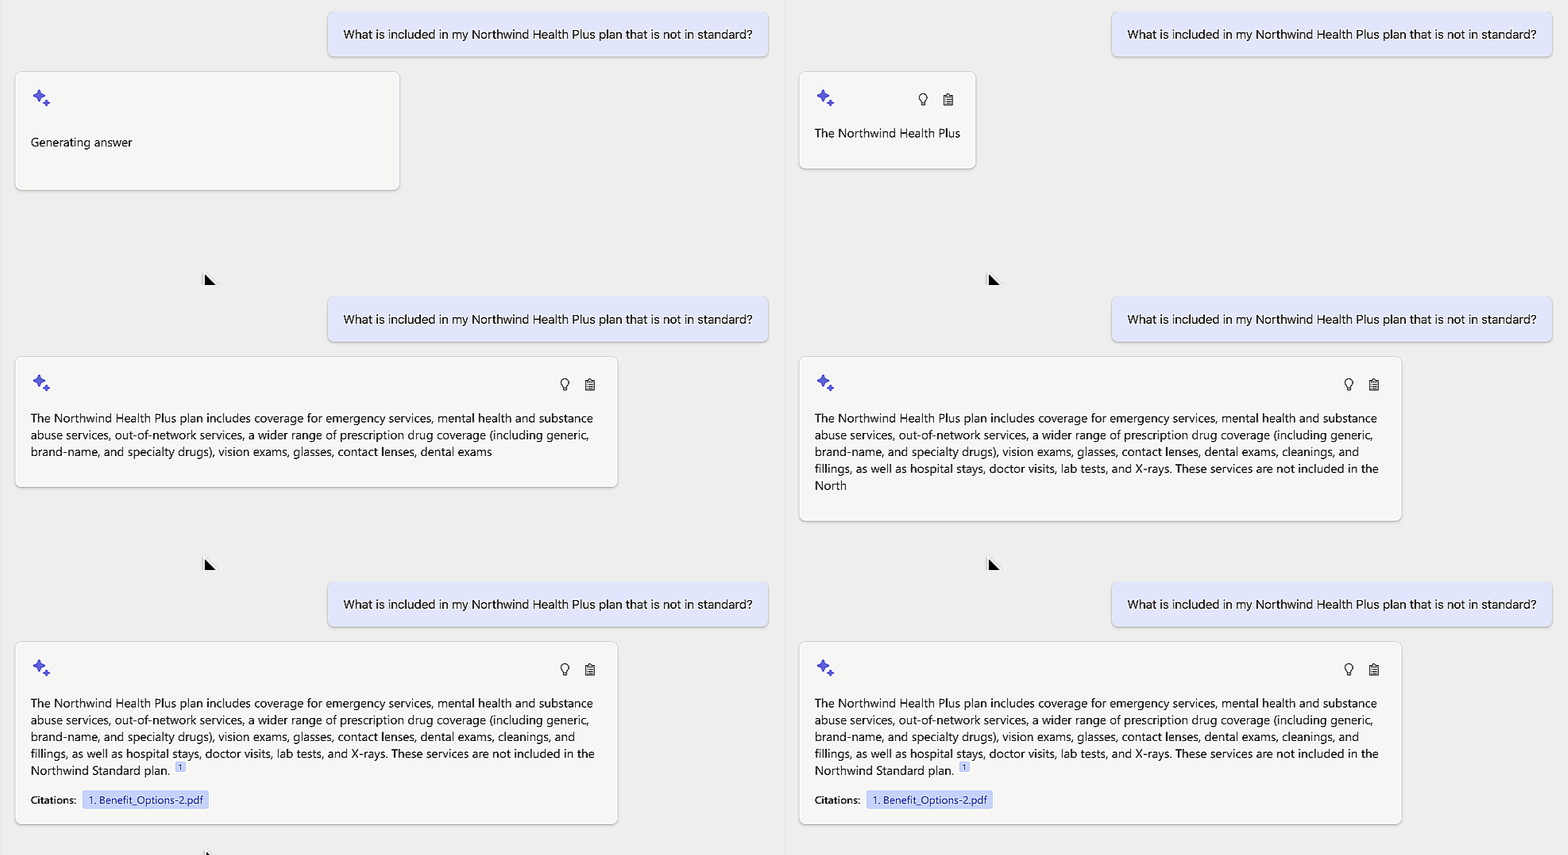
The Azure SDK team recently asked if I could create a sample using Flask to stream ChatGPT completions to the browser over SSE. I said, "sure, but what's SSE?" As I've now discovered, server-sent events (SSE) are a technology that has been supported in modern browsers for a few years, and they're a great way for a server to stream a long response to a client. They're similar to websockets, but the streaming only happens in one direction. SSE is a good fit for ChatGPT responses since they can come in chunk-by-chunk, and displaying that way in a web UI makes for a more chat-like experience.

You can check out the repo here:
https://github.com/Azure-Samples/chatgpt-quickstart

Let's break it down.


Overall architecture

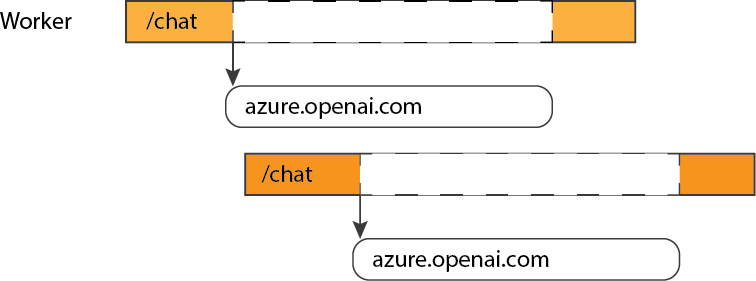
When a user submits a message from the webpage, the browser uses EventSource to connect to the /chat endpoint, sending the message in the query parameters. The Flask server receives the request, then requests the ChatGPT SDK to respond with a stream. The SDK opens a network connection to the deployed ChatGPT model on Azure, and whenever it receives another chunk, it sends it back as JSON. The Flask app extracts the text from that chunk and streams it to the client. Whenever the browser receives a new server-sent event, it appends it to the current message.


The client-side JavaScript code

For the client-side code, I considered using HTMX with the SSE extension but I decided to use the built-in EventSource object for maximal flexibility.

Whenever the form is submitted, I create a new message DIV and set up a new EventSource instance. That instance listens to three events: the standard "message" event, and two custom events of my own invention, "start" and "end". I added the start event so that I could know when to clear a loading indicator from the message area, and I added the end event so that I could close the stream.

eventSource = new EventSource(`/chat?message=${message}`);
eventSource.addEventListener("start", function(e) {
  messageDiv.innerHTML = "";
});
eventSource.addEventListener("message", function(e) {
  const message = JSON.parse(e.data);
  messageDiv.innerHTML += message.text.replace("\n", "<br/>");
  messageDiv.scrollIntoView();
});
eventSource.addEventListener('end', function(e) {
  eventSource.close();
});

See the full code in index.html

The Flask server Python code

In the Flask server code, I did a few key things differently in order to send back server-sent events:

  • The response object is a Python generator, a type of function that can continually yield new values. That is natively supported by Flask as the way to stream data.
  • The call to the OpenAI SDK specifies stream=True and then uses an iterator on the SDK's response.
  • The response content-type is "text/event-stream".
@bp.get("/chat")
def chat_handler():
    request_message = request.args.get("message")

    @stream_with_context
    def response_stream():
        response = openai.ChatCompletion.create(
            engine=os.getenv("AZURE_OPENAI_CHATGPT_DEPLOYMENT", "chatgpt"),
            messages=[
                {"role": "system", "content": "You are a helpful assistant."},
                {"role": "user", "content": request_message},
            ],
            stream=True,
        )
        for event in response:
            current_app.logger.info(event)
            if event["choices"][0]["delta"].get("role") == "assistant":
                yield "event:start\ndata: stream\n\n"
            if event["choices"][0]["delta"].get("content") is not None:
                response_message = event["choices"][0]["delta"]["content"]
                json_data = json.dumps({"text": response_message})
                yield f"event:message\ndata: {json_data}\n\n"
        yield "event: end\ndata: stream\n\n"

    return Response(response_stream(), mimetype="text/event-stream")

It's also worth pointing out that the generator is wrapped with the stream_with_context decorator. I added that so that the code inside the generator could access current_app for logging purposes.

See full code in chat.py


Taking it further

This is intentionally a very minimal example, since the goal is to just get developers up and running with a ChatGPT deployment. There are a lot of ways this could be improved:

  • POST vs. GET: I used a single HTTP GET request to both send the message and receive the response. An alternative approach is to use an HTTP POST to send the message, use a session to associate the message with the ChatGPT response, and open a GET request to a /response endpoint for with that session.
  • Message history: This app only sends the most recent message, but ChatGPT can often give better answers if it remembers previous messages. You could use sessions on the server side or local storage on the browser side to remember the last few messages. That does have budget implications (more tokens == more $$) but could provide a better user experience.
  • Message formatting: I've seen some ChatGPT samples that apply Markdown formatting to the message. You could bring in a library to do the Markdown -> HTML transformation in the client. It'd be interesting to see how that works in combination with server-sent events.

Monday, May 22, 2023

A Dev Container for SQLAlchemy with SQLTools

SQLAlchemy 2.0 was recently released, with a few significant interface differences. I'm working on a video that walks through a SQLAlchemy 2.0 example, and in the process of making that video, I created a Dev Container optimized for SQLAlchemy + SQLite + SQLTools.

You can get the Dev Container here (or try it in Codespaces first!):
github.com/pamelafox/sqlalchemy-sqlite-playground


Dev Container contents

The devcontainer.json includes:

  • A base image of mcr.microsoft.com/devcontainers/python:3.11
  • Python linting extensions:
    "ms-python.python",
    "ms-python.vscode-pylance",
    "charliermarsh.ruff"
        
  • SQLTools extension and SQLite driver:
    "mtxr.sqltools",
    "mtxr.sqltools-driver-sqlite"
  • The node feature (necessary for the SQLTools SQLite driver)
  • A related setting necessary for SQLite driver:
    "sqltools.useNodeRuntime": true,
  • Preset connection for a SQLite DB stored in my_database.db file:
    "sqltools.connections": [
      {
        "previewLimit": 50,
        "driver": "SQLite",
        "name": "database",
        "database": "my_database.db"
       }],
  • A post-create command that installs SQLAlchemy and Faker:
    python3 -m pip install -r requirements.txt

Besides the .devcontainer folder and requirements.txt, the repository also contains example.py, a file with SQLAlchemy 2.0 example code.


Using the Dev Container

  1. Open the project in either GitHub Codespaces or VS Code with the Dev Containers extension. As part of starting up, it will auto-install the requirements and SQLTools will detect node is already installed: Screenshot of VS Code terminal after installing pip requirements, with pop-up about node being detected
  2. Run example.py: Screenshot of python file with cursor on run icon in top left
  3. Select the SQLTools icon in the sidebar: Screenshot of VS Code sidebar with cursor over SQLTools icon
  4. Next to the preset connection, select the connect icon (a plug): Screenshot of VS Code sidebar with SQLTools extension open, cursor on right side of database connection
  5. When it prompts you to install the sqlite npm package, select Install now: Screenshot of VS Code terminal with prompt from SQLTools about installing sqlite package
  6. When it's done installing, select Connect to database. Screenshot of VS Code with prompt from SQLTools about sqlite successful installation
  7. Browse the table rows by selecting the magnifying glass next to teach table. Screenshot from SQLTools VS Code extension with customers table open and rows of generated data

Wednesday, May 10, 2023

Deploying to App Service free tier with Bicep

I've started moving as many samples as possible to using the Azure App Service free tier. It's a tier with a lot of limitations since it's just designed to give developers a feel for the offering before moving on to production-level tiers, but it can be a good fit for sample code.

Since all of my Azure samples are designed to be deployed with the Azure Developer CLI, they all contain infra/ folders with Bicep files describing the resources to be deployed.

To deploy a web app to App Service free tier, you need to make a few changes:

  1. For the App Service Plan ('Microsoft.Web/serverfarms'), set the sku to 'F1'.
  2. For the App Service itself ('Microsoft.Web/sites'), set properties.siteConfig.alwaysOn to false and properties.siteConfig.use32BitWorkerProcess to true. Those changes are necessary to avoid errors, since free tier App Service doesn't support always-on or 64-bit workers.

To help out folks who are searching the web for answers, here's an error you may encounter with the wrong configuration:

Cannot update the site 'your-site-name-here' because it uses x64 worker process which is not allowed in the target compute mode.

Monday, May 8, 2023

Deploying PostgreSQL servers with Bicep

I gave a talk at the recent CitusCon about deploying PostgreSQL servers to Azure using Bicep, an infrastructure-as-code language. You can watch the talk on YouTube or go through the online slides.

For those of you that prefer reading, this blog post is a "blog-post-ification" of my talk. Hope it helps you with more repeatable PostgreSQL deploys!

Managed services for PostgreSQL on Azure

Azure has multiple offerings for PostgreSQL, and it can be confusing to know which one to use. Here's a quick overview:

Option Description
Azure Database for PostgreSQL – Single Server Microsoft's original offering. No longer recommended for new apps.
Azure Database for PostgreSQL – Flexible Server Microsoft's most recent PostgreSQL offering. Fully managed service with vertical scaling.
Azure Cosmos DB for PostgreSQL Distributed database using PostgreSQL and the Citus extension. Can scale horizontally.

For more details on the differences, check out these blog posts from the Azure team:

In this blog post, I am focusing on the PostgreSQL Flexible server offering, since that's a great fit for Python web apps and it's what I have the most experience deploying. The concepts covered here should be helpful for deploying other Azure database servers as well, however.

Ways to deploy
a PostgreSQL Flexible Server

There are quite a few ways to deploy a PostgreSQL Flexible Server to Azure: Azure portal, Azure CLI, Azure PowerShell, Azure SDKs, ARM templates, Terraform, and Azure Bicep. First, let me point out why I dislike many of those options.

Using the Azure Portal

Azure portal screenshot

Creating new resources using the Azure portal is a great way to get started with Azure, but it's not good for replicable deploys of similar resources. I do recommend going through the Portal creation process once (for a throw-away server) just to get a feel for the options, but then immediately moving on to other approaches.

Using CLI commands

An improvement over the Portal is the Azure CLI or Powershell modules, which allow you to specify all the parameters in a single command.

Azure CLI example:

az postgres flexible-server create --resource-group pg-grp \
    --name pg-srv --location westus \
    --sku-name GP_Gen5_2 --version 14 \
    --admin-user myadmin --admin-password NeverShowThis

Azure PowerShell example:

New-AzPostgreSqlFlexibleServer -ResourceGroupName pg-grp \
    -ServerName pg-srv -Location westus \
    -SkuName GP_Gen5_2 -Version 14 \
    -AdministratorLogin myadmin -AdministratorLoginPassword NeverShowThis

It's easier to replicate deploys now, since you can just copy the command. However, if you realize you need to update the server configuration afterwards, you have to run a different command (update), so replication would then require multiple commands or a merging of the create and update commands. 😩

Using ARM templates

ARM (Azure Resource Manager) templates are JSON files that declaratively describe the resources you want to create.

{
    "type": "Microsoft.DBforPostgreSQL/flexibleServers",
    "apiVersion": "2021-06-01",
    "name": "pg-srv",
    "location": "westus",
    "sku": {
        "name": "Standard_B1ms",
        "tier": "Burstable"
    },
    "properties": {
        "administratorLogin": "admin-user",
        "administratorLoginPassword": "NeverShowThis",
        "version": "14"
     }
    ...

👁️ See full example in postgres_example.json

ARM templates are a great way to replicate deploys, but using JSON as a file format leads to fairly unwieldy files that are difficult to parameterize. That's why Azure invented...

Bicep

Bicep is a DSL (domain-specific language) that compiles down to ARM templates. The example below shows a minimal configuration for a PostgreSQL Flexible server:

resource server 'Microsoft.DBforPostgreSQL/flexibleServers@2021-06-01' = {
    name: 'pg-srv'
    location: 'eastus'
    sku: {
        name: 'Standard_B1ms'
        tier: 'Burstable'
    }
    properties: {
        administratorLogin: 'myadmin'
        administratorLoginPassword: 'NeverShowThis'
        version: '14'
        storage: {
        storageSizeGB: 128
        }
    }
}

The Bicep language

Bicep offers quite a few language features that make it easier to write and maintain, and we'll see examples of each of these in the rest of this post.

Feature Example
Parameters param location string = 'eastus'
Types param storageSizeGB int = 128
Logic skuTier == 'Burstable' ? 32 : 128
Loops for i in range(0, serverCount):
Functions param adminUsername string = newGuid()
Modules module myServer 'flexserver.bicep' { }

For a detailed introduction to the entire Bicep language, consult the Bicep language documentation .

A parameterized Bicep file

We can parameterize the Bicep file to make it easier to reuse, using parameters for values that vary across deployments. The example below parameterizes the server name, location, and admin password:

param serverName string = 'pg-srv'
param location string = 'eastus'
@secure()
param adminPassword string

resource srv 'Microsoft.DBforPostgreSQL/flexibleServers@2021-06-01' = {
    name: serverName
    location: location
    sku: {
        name: 'Standard_B1ms'
        tier: 'Burstable'
    }
    properties: {
        administratorLogin: 'myadmin'
        administratorLoginPassword: adminPassword
        version: '14'
        storage: { storageSizeGB: 128 }
    }  
}

Deploying from Bicep

Once we have a Bicep file, we can deploy it using Azure CLI commands.

The az deployment group create command will either create or update resources in an existing resource group. If the described resources already exist, it will just update their configuration (if any change detected). If they don't exist, it will create the resources from scratch. The example below shows what it's like to deploy the file above:

$ az deployment group create --resource-group pg-grp --template-file pg.bicep
Please provide securestring value for 'adminPassword' (? for help):
{   "name": "postgres_example1",
    "properties": {
    "outputResources": [{
        "id": "/subscriptions/32ea8a26-5b40-4838-b6cb-be5c89a57c16/resourceGroups/cituscon-examples-eastus/providers/Microsoft.DBforPostgreSQL/flexibleServers/pg-srv",
        "resourceGroup": "pg-grp"
        }], ...

The output contains a long JSON description of all the created resources (truncated here).

If needed, it's possible to specify parameters on the command line:

$ az deployment group create --resource-group pg-grp --template-file pg.bicep \
    --parameters adminPassword=ADMIN_PASSWORD

Once the command finishes, logging into the Portal shows the newly created server:

Screenshot of Portal overview page for server

Child resources

A child resource exists solely within the scope of its parent resource.

These are the child resources that can be created for PostgreSQL Flexible servers:

  • administrators
  • configurations
  • databases
  • firewallRules
  • migrations

There are also a few read-only child resources that can be referenced in Bicep (but not created through Bicep): advisors, backups, queryTexts.

Child resources: database

Each PostgreSQL Flexible server always includes a database called postgres plus system databases azure_maintenance and azure_sys.

Additional databases can be created as child resources of the server, as shown in the example below:

resource postgresServer 'Microsoft.DBforPostgreSQL/flexibleServers@2022-12-01' = {
    name: serverName
    location: location
    ...

    resource database 'databases' = {
        name: 'webapp'
    }
}

👁️ See full example in postgres_database.bicep

Child resources: databases

You may also want to create multiple databases at once. That's a great time to use an array parameter type with a for loop:

param databaseNames array = ['webapp', 'analytics']

resource postgresServer 'Microsoft.DBforPostgreSQL/flexibleServers@2022-12-01' = {
    name: serverName
    location: location
    ...

    resource database 'databases' = [for name in databaseNames: {
        name: name
    }]
}

👁️ See full example in postgres_databases.bicep

Once deployed, the databases will show up in the Portal, along with an option to connect to them with a shell:

Screenshot of Databases page of PostgreSQL server

Child resources: firewall rule

By default, a PostgreSQL Flexible server is configured for "Public access" but it's not yet accessible from any IP ranges. You can use firewallRules to allow access from particular IPs.

The example below allows access from any Azure service within Azure:

resource firewallAzure 'firewallRules' = {
    name: 'allow-all-azure-internal-IPs'
    properties: {
        startIpAddress: '0.0.0.0'
        endIpAddress: '0.0.0.0'
    }
}

👁️ See full example in postgres_azurefirewall.bicep

⚠️ This configuration means that any Azure developer can now access the server, if they somehow know the username and password. Stay tuned to see how to deploy PostgreSQL within a Virtual network, the preferred approach.

You may want to allow access for just your work machine(s). The example below creates rules for each IP in list using array with for:

param allowedSingleIPs array = ['103.64.88.254', '44.143.22.28']

resource postgresServer 'Microsoft.DBforPostgreSQL/flexibleServers@2022-12-01' = {
    ...

    resource firewallSingle 'firewallRules' = [for ip in allowedSingleIPs: {
        name: 'allow-single-${replace(ip, '.', '')}'
        properties: {
            startIpAddress: ip
            endIpAddress: ip
        }
    }]
}

👁️ See full example in postgres_loopfirewall.bicep

Once deployed, the firewall rules will show up in the Portal in the Networking section:

Screenshot of Networking page of PostgreSQL server

Adding a Virtual Network

As a security best practice, Azure recommends that you deploy PostgreSQL servers in a Virtual Network (VNet), along with other Azure resources that need access to it.

I'll step through the Bicep needed to deploy both a PostgreSQL server and an App Service App inside a VNet (each delegated to their own subnet), and use a Private DNS Zone for name resolution between the App and PG server.

Virtual Network

The resource definition below creates a VNet with a private address space of 10.0.0.0 - 10.0.255.255:

resource virtualNetwork 'Microsoft.Network/virtualNetworks@2019-11-01' = {
    name: '${name}-vnet'
    location: location
    properties: {
        addressSpace: {
        addressPrefixes: [
            '10.0.0.0/16'
        ]
        }
    }
}

Virtual Network: subnets

The next step is to define subnets in the VNet, by adding child resources to that VNet resource. The child resource below creates a subnet with address space of 10.0.0.1 - 10.0.0.255 and delegates it to PostgreSQL servers:

resource databaseSubnet 'subnets' = {
    name: 'database-subnet'
    properties: {
        addressPrefix: '10.0.0.0/24'
        delegations: [
        {
            name: '${name}-subnet-delegation'
            properties: {
            serviceName: 'Microsoft.DBforPostgreSQL/flexibleServers'
            }
        }]
    }
}

If you're new to '10.0.0.0/24' notation, see this post on Configuring Azure VNet subnets with CIDR notation

Similarly, the child resource below creates a subnet with address space of 10.0.1.1 - 10.0.1.255 and delegates it to the other resource type (App Service):

resource webappSubnet 'subnets' = {
    name: 'webapp-subnet'
    properties: {
        addressPrefix: '10.0.1.0/24'
        delegations: [
        {
            name: '${name}-subnet-delegation-web'
            properties: {
            serviceName: 'Microsoft.Web/serverFarms'
            }
        }]
    }
}

Private DNS Zone

To make it easy for the App Service to connect to the PostgreSQL server, create a private DNS Zone resource:

resource privateDnsZone 'Microsoft.Network/privateDnsZones@2020-06-01' = {
    name: '${pgServerPrefix}.private.postgres.database.azure.com'
    location: 'global'
    resource vNetLink 'virtualNetworkLinks' = {
        name: '${pgServerPrefix}-link'
        location: 'global'
        properties: {
            registrationEnabled: false
            virtualNetwork: { id: virtualNetwork.id }
        }
    }
}

The name of the resource must end in .private.postgres.database.azure.com. For more details, read these reference materials:

Configure the PostgreSQL server

With the VNet and DNS zone created, the next step is to modify the configuration of the PostgreSQL server to connect to both of them.

The Bicep below adds the network property of the server to inject it into the VNet and connect it to the DNS Zone:

resource postgresServer 'Microsoft.DBforPostgreSQL/flexibleServers@2022-01-20-preview' = {
    name: pgServerPrefix
    ...

    properties: {
        ...
        network: {
            delegatedSubnetResourceId: virtualNetwork::databaseSubnet.id
            privateDnsZoneArmResourceId: privateDnsZone.id
        }
    }
}

Configure the Web App

The App Service also needs to be connected to the VNet (though it doesn't need to be connected to the DNS Zone).

This Bicep adds a networkConfig child resource on the Web App Service to inject it into the VNet:

resource web 'Microsoft.Web/sites@2022-03-01' = {
    name: '${name}-app-service'
    ...

    resource webappVnetConfig 'networkConfig' = {
        name: 'virtualNetwork'
        properties: {
            subnetResourceId: virtualNetwork::webappSubnet.id
        }
    }
}

All together: PostgreSQL in VNet

That's everything needed!
👁️ See full example in postgres_vnet.bicep

After deploying the Bicep, the Azure Portal shows all four resources:

Tips & Tricks

Here are a few things I've learnt while deploying PostgreSQL with Bicep dozens of times over the last year.

PostgreSQL tips

  • Managed identity is a more secure approach than username/password. See sample at: github.com/Azure-Samples/flask-postgresql-managed-identity . That example uses the service connector command, as it doesn't seem possible yet to create a managed identity for PostgreSQL servers entirely with Bicep. We are hoping that it becomes easier in the future.
  • Location, location, location:
    There are some location constraints for PostgreSQL servers, especially for Microsoft employees. If you get a funky error, try again with a new location (like "centralus").
  • Many things can't be changed after creation: admin username, PostgreSQL version, location, networking option, etc. Give everything a good look before you start adding production data.

Bicep linting

I love linting all my code, and Bicep is no exception.

You can use az bicep build command to check file for errors:

$ az bicep build -f pg.bicep

You could use that in a pre-commit hook and/or setup a CI/CD workflow to always check for errors:

steps:
    - name: Checkout
    uses: actions/checkout@v2

    - name: Azure CLI script
    uses: azure/CLI@v1
    with:
        inlineScript: az bicep build -f infra/main.bicep

👁️ See whole file: azure-bicep.yaml

Bicep security validation

It's also possible to run automated checks for security issues and best practices based solely on the Bicep files.

In CI/CD, you can use Microsoft Security DevOps action to find security issues in Bicep files:

- name: Run Microsoft Security DevOps Analysis
    uses: microsoft/security-devops-action@preview
    id: msdo
    with:
    tools: templateanalyzer

Here's an example of the kind of output it produces:


Error:      1. TemplateAnalyzer Error AZR-000284 - File: infra/main.bicep. Line: 54. Column 0. 
Tool: TemplateAnalyzer: Rule: AZR-000284 (Azure.Deployment.AdminUsername).
https://azure.github.io/PSRule.Rules.Azure/en/rules/Azure.Deployment.AdminUsername/
Resource properties can be configured using a hardcoded value or Azure Bicep/ template
expressions. When specifing sensitive values, use secure parameters such as secureString
or secureObject.

👁️ See whole file: azure-dev-validate.yaml

AZD templates

You can use Bicep to create all of your Azure resources, and use the new Azure Developer CLI to take care of the whole deployment workflow. It is my favorite way to deploy web apps on Azure these days.

To get started with the Azure Developer CLI, check out the many aka.ms/azd-pg templates that use PostgreSQL in the AZD templates gallery.

For more Bicep tips, check out my previous blog post: 🔗 aka.ms/bicep-tips Tips for writing Bicep files

Let me know if you have any questions or suggestions for the Azure team!

Friday, April 7, 2023

Converting a Spreadsheet to JSON with Neptyne

My all-time most popular post on this blog is from 10 years ago, about exporting a Google Spreadsheet as JSON. My approach in that post is to use a Google Apps Script (that I wrote). Developers still seem to reference that blog post and use the script, but I no longer maintain it. Apps Script has become increasingly harder to work with over the years, and last time I tried, I couldn't even figure out how to give my spreadsheet permission to run a script that *I* wrote.

What am I using now? Neptyne: an app co-founded by my former colleague Douwe Osinga that combines online spreadsheets with Python scripting. Every sheet can be easily manipulated as a Pandas data frame, and you can run Excel formulas from Python. To me, it's the best of both worlds!

So when I needed to convert a spreadsheet to JSON, I imported it into Neptyne from Google spreadsheets (which they make very easy with the "Import from Google Sheets" option). Then I opened the Python tab on the right side and ran this code:

print(Talks!A:J.to_dataframe(header=True).to_json(orient='records', indent=2))

Let's break that one liner down:

  • Projects!A:J is a reference to the "Projects" worksheet and columns A through J. This is the same way it'd be referenced in Excel or Google Sheets.
  • .to_dataframe(header=true) converts the sheet to a Pandas dataframe, including the first row as the header columns.
  • .to_json(orient='records', indent=2) is a built-in function for Pandas dataframes that outputs pretty-printed JSON.

That gives me output like:

[
  {
    "title":"Containerizing Python Web Apps Workshop",
    "date":"2023-01-25T05:00:00.000Z",
    "description":"A workshop about containerizing Python apps.",
    "thumbnail":"https:\/\/pamelafox.github.io\/my-py-talks\/containers-workshop\/flask.png",
    "slides":"https:\/\/pamelafox.github.io\/my-py-talks\/containers-workshop\/",
    "video":null,
    "tags":"python",
    "location":"GDI (Virtual)",
    "cospeakers":null,
    "include":"yes"
  },
  ...

That's one line of Python code compared to many many lines of Apps Script. ❤️ it! Obviously, not everyone can easily move your spreadsheets from Google, but if you can, I think you'll find it's much more enjoyable to programmatically work with sheet data in Neptyne. And if it's not, give the Neptyne team your feedback, I'm sure they'd love to hear it.

Friday, March 31, 2023

Adding Microsoft Graph authentication as a Flask Blueprint

Over the last month, I've been working a lot with the Microsoft Graph API identity platform, which makes it possible for users to login to a website with a Microsoft 365 account. With some additional configuration, it even acts as a generic customer identity management solution.

For Python developers, msal has been the traditional package for interacting with the API. However, the author of that library recently developed a higher-level package, identity, to wrap the most common authentication flow. The ms-identity-python-webapp sample demonstrates how to use that flow in a minimal Flask web app.

Flask developers often use Blueprints and Application factories to organize large Flask apps, and many requested guidance on integrating the authentication code with a Blueprint-based application. I have developed a few Blueprint-based apps lately, so I decided to attempt the integration myself. Good news: it worked! 🎉

You can see my integration in the identity branch of flask-surveys-container-app, and look through the changes in the pull request.

To aid others in their integration, I'll walk through the notable bits.

The auth blueprint

First I added an auth blueprint to bundle up the auth-related routes and templates.

auth/
├── __init__.py
├── routes.py
└── templates/
    └── auth/
        ├── auth_error.html
        └── login.html

The routes in the blueprint are similar to those in the original sample. However, I added a line to store next_url inside the current session. By remembering that, a user can login from any page and get redirected back to that page (versus getting redirected back to the index). That's a much nicer user experience in a large app.

@bp.route("/login")
def login():
    auth = current_app.config["AUTH"]
    session["next_url"] = request.args.get("next_url", url_for("index"))
    return render_template(
        "auth/login.html",
        version=identity.__version__,
        **auth.log_in(
            scopes=current_app.config["SCOPE"],
            redirect_uri=url_for(".auth_response", _external=True)
        ),
    )

@bp.route("/getAToken")
def auth_response():
    auth = current_app.config["AUTH"]
    result = auth.complete_log_in(request.args)
    if "error" in result:
        return render_template("auth/auth_error.html", result=result)
    next_url = session.pop("next_url", url_for("index"))
    return redirect(next_url)


@bp.route("/logout")
def logout():
    auth = current_app.config["AUTH"]
    return redirect(auth.log_out(url_for("index", _external=True)))

The templates in the auth blueprint now extend base.html, the only template in the root templates directory. That gives the authentication-related pages a more consistent UI with the rest of the site.

App configuration

The global app configuration happens in the root __init__.py, mostly inside the create_app function.

To make sure I could access the identity package's Auth object from any blueprint, I added it to app.config:

app.config.update(
    AUTH=identity.web.Auth(
        session=session,
        authority=app.config.get("AUTHORITY"),
        client_id=app.config["CLIENT_ID"],
        client_credential=app.config["CLIENT_SECRET"],
    )
)

I also used the app.context_processor decorator to inject a user variable into every template that gets rendered.

@app.context_processor
def inject_user():
    auth = app.config["AUTH"]
    user = auth.get_user()
    return dict(user=user)

Finally, I registered the new auth blueprint in the usual way:

from backend.auth import bp as auth_bp

app.register_blueprint(auth_bp, url_prefix="")

Requiring login

Typically, in an app with user authentication, logging in is required for some routes while optional for others. To mark routes accordingly, I defined a login_required decorator:

def login_required(f):
    @wraps(f)
    def decorated_function(*args, **kwargs):
        auth = current_app.config["AUTH"]
        if auth.get_user() is None:
            login_url = url_for("auth.login", next_url=request.url)
            return redirect(login_url)
        return f(*args, **kwargs)
    return decorated_function

When that decorator sees that there is no current user, it forces a redirect to the auth blueprint's login route, and passes along the current URL as the next URL.

I then applied that decorator to any route that required login:

@bp.route("/surveys/new", methods=["GET"])
@login_required
def surveys_create_page():
    return render_template("surveys/surveys_create.html")

Accessing user in templates

I want to let users know their current login status on every page in the app, and give them a way to either login or log out. To accomplish that, I added some logic to the Bootstrap nav bar in base.html:

{% if user %}
  <li class="nav-item dropdown">
      <a class="nav-link dropdown-toggle" href="/"
            id="navbarDropdown" role="button"
            data-bs-toggle="dropdown" aria-expanded="false">
        {{ user.get("name")}}
      </a>
      <ul class="dropdown-menu dropdown-menu-end" aria-labelledby="navbarDropdown">
        <li class="nav-item">
          <a class="nav-link" href="{{ url_for('auth.logout') }}">Sign out</a>
        </li>
      </ul>
  </li>
{% else %}
  <li class="nav-item">
    <a class="nav-link" href="{{ url_for('auth.login') }}">Sign in</a>
  </li>
{% endif %}

...And that's about it! Look throughthe full code or pull request for more details. Let me know if you have suggestions for a better way to architect the auth blueprint, or if you end up using this in your own app. 🤔

Friday, March 3, 2023

Deploying a containerized FastAPI app to Azure Container Apps

Based on my older post about deploying a containerized Flask app to Azure Container Apps, here's a similar process for deploying a FastAPI app instead.

First, some Docker jargon:

  • A Docker image is a multi-layered environment that is exactly the environment your app thrives in, such as a Linux OS with Python 3.11 and FastAPI installed. You can also think of an image as a snapshot or a template.
  • A Docker container is an instance of an image, which could run locally on your machine or in the cloud.
  • A registry is a place to host images. There are cloud hosted registries like DockerHub and Azure Container Registry. You can pull images down from those registries, or push images up to them.

These are the high-level steps:

  1. Build an image of the FastAPI application locally and confirm it works when containerized.
  2. Push the image to the Azure Container Registry.
  3. Create an Azure Container App for that image.

Build image of FastAPI app

I start from a very simple FastAPI app inside a main.py file:

import random

import fastapi

app = fastapi.FastAPI()

@app.get("/generate_name")
async def generate_name(starts_with: str = None):
    names = ["Minnie", "Margaret", "Myrtle", "Noa", "Nadia"]
    if starts_with:
        names = [n for n in names if n.lower().startswith(starts_with)]
    random_name = random.choice(names)
    return {"name": random_name}

I define the dependencies in a requirements.txt file. The FastAPI documentation generally recommends uvicorn as the server, so I stuck with that.

fastapi==0.92.0
uvicorn[standard]==0.20.0

Based on FastAPI's tutorial on Docker deployment, I add this Dockerfile file:

FROM python:3.11

WORKDIR /code

COPY requirements.txt .

RUN pip install --no-cache-dir --upgrade -r requirements.txt

COPY . .

EXPOSE 80

CMD ["uvicorn", "main:app", "--host", "0.0.0.0", "--port", "80", "--proxy-headers"]

That file tells Docker to start from a base image which has python 3.11 installed, create a /code directory, install the package requirements, copy the code into the directory, expose port 80, and run the uvicorn server at port 80.

I also add a .dockerignore file to make sure Docker doesn't copy over unneeded files:

.git*
**/*.pyc
.venv/

I build the Docker image using the "Build image" option from the VS Code Docker extension. However, it can also be built from the command line:

docker build --tag fastapi-demo .

Now that the image is built, I can run a container using it:

docker run -d --name fastapi-container -p 80:80 fastapi-demo

The Dockerfile tells FastAPI to use a port of 80, so the run command publishes the container's port 80 as port 80 on the local computer. I visit localhost:80/generate_name to confirm that my API is up and running. 🏃🏽‍♀️

Deploying Option #1: az containerapp up

The Azure CLI has a single command that can take care of all the common steps of container app deployment: az container up.

From the app folder, I run the up command:

az containerapp up \
  -g fastapi-aca-rg \
  -n fastapi-aca-app \
  --registry-server pamelascontainerregistry.azurecr.io \
  --ingress external \
  --target-port 80 \
  --source .

That command does the following:

  1. Creates an Azure resource group named "fastapi-aca-rg". A resource group is basically a folder for all the resources it creates after.
  2. Creates a Container App Environment and Log Analytics workspace inside that group.
  3. Builds the container image using the local Dockerfile.
  4. Pushes the image to my existing registry (pamelascontainerregistry.azurecr.io). I'm reusing my old registry to save costs, but if I wanted the command to create a new one, I would just remove the registry-server argument.
  5. Creates a Container App "fastapi-aca-app" that uses the pushed image and allows external ingress on port 80 (public HTTP access).

When the steps are successful, the public URL is displayed in the output:

Browse to your container app at:
http://fastapi-aca-app.salmontree-4f877506.northcentralusstage.azurecontainerapps.io 

Whenever I update the app code, I run that command again and it repeats the last three steps. Easy peasy! Check the az containerapp up reference to see what additional options are available.

Deploying Option #2: Step-by-step az commands

If you need more customization of the deploying process than is possible with up, it's also possible to do each of those steps yourself using specific Azure CLI commands.

Push image to registry

I follow this tutorial to push an image to the registry, with some customizations.

I create a resource group:

az group create --location eastus --name fastapi-aca-rg

I already had a container registry from my containerized FastAPI app, so I reuse that registry to save costs. If I didn't already have it, I'd run this command to create it:

az acr create --resource-group fastapi-aca-rg \
  --name pamelascontainerregistry --sku Basic

Then I log into the registry so that later commands can push images to it:

az acr login --name pamelascontainerregistry

Now comes the tricky part: pushing an image to that repository. I am working on a Mac with an M1 (ARM 64) chip, but Azure Container Apps (and other cloud-hosted container runners) expect images to be built for an Intel (AMD 64) chip. That means I can't just push the image that I built in the earlier step, I actually have to build specifically for AMD 64 and push that image.

One way to do that is with the docker buildx command, specifying the target architecture and target registry location:

docker buildx build --push --platform linux/amd64 \
    -t pamelascontainerregistry.azurecr.io/fastapi-aca:latest .

However, a much faster way to do it is with the az acr build command, which uploads the code to cloud and builds it there:

az acr build --platform linux/amd64 \
    -t pamelascontainerregistry.azurecr.io/fastapi-aca:latest \
    -r pamelascontainerregistry .

⏱ The `docker buildx` command takes ~ 10 minutes, whereas the `az acr build` command takes only a minute. Nice!

Deploy to Azure Container App

Now that I have an image uploaded to a registry, I can create a container app for that image. I followed this tutorial.

I upgrade the extension and register the necessary providers:

az extension add --name containerapp --upgrade
az provider register --namespace Microsoft.App
az provider register --namespace Microsoft.OperationalInsights

Then I create an environment for the container app:

az containerapp env create --name fastapi-aca-env \
    --resource-group fastapi-aca-rg --location eastus

Next, I generate credentials to use for the next step:

az acr credential show --name pamelascontainerregistry

Finally, I create the container app, passing in the username and password from the credentials:

az containerapp create --name fastapi-aca-app \
    --resource-group fastapi-aca-rg \
    --image pamelascontainerregistry.azurecr.io/fastapi-aca:latest \
    --environment fastapi-aca-env \
    --registry-server pamelascontainerregistry.azurecr.io \
    --registry-username pamelascontainerregistry \
    --registry-password <PASSWORD HERE> \
    --ingress external \
    --target-port 80

The command returns JSON describing the created resource, which includes the URL of the created app in the "fqdn" property. That URL is also displayed in the Azure portal, in the overview page for the container app. I followed the URL, appended the API route "/generate_name", and verified it responded successfully. 🎉 Woot!

When I make any code updates, I re-build the image and tell the container app to update:

az acr build --platform linux/amd64 \
    -t pamelascontainerregistry.azurecr.io/fastapi-aca:latest \
    -r pamelascontainerregistry .

az containerapp update --name fastapi-aca-app \
  --resource-group fastapi-aca-rg \
  --image pamelascontainerregistry.azurecr.io/fastapi-aca:latest 

🐳 Now I'm off to containerize more apps!

Thursday, March 2, 2023

Rendering matplotlib charts in Flask

Way back in the day when I was working in Google developer relations, we released one of my favorite tools: the Google Charts API. It was an image API which, with the right set of query parameters, could produce everything from bar charts to "Google-o-meters". The team even added custom map markers to the API at one point. I pointedly asked team "do you promise not to deprecate this?" before using the map marker output in Google Maps API demos, since Google had started getting deprecation-happy. They promised not to, but alas, just a few years later, the API was indeed deprecated!

In honor of the fallen API, I created a sample app this week that serves a simple Charts API, currently outputting just bar charts and pie charts.

API URLs on left side and Chart API output on right side

To output the charts, I surveyed the landscape of Python charting options and decided to go with matplotlib, since I have at least some familiarity with it, plus it even has a documentation page showing usage in Flask.

Figure vs pyplot

When using matplotlib in Jupyter notebooks, the standard approach is to use pylot like so:

import matplotlib.pyplot as plt

fig, ax = plt.subplots()
ax.pie(data["values"], labels=data.get("labels"))

However, the documentation discourages use of pyplot in web servers and instead recommends using the Figure class, like so:

from matplotlib.figure import Figure

fig = Figure()
axes = fig.subplots(squeeze=False)[0][0]
axes.pie(data["values"], labels=data.get("labels"))

From Figure to PNG response

The next piece of the puzzle is turning the Figure object into a Flask Response containing a binary PNG file. I first save the figure into a BytesIO buffer from Python's io module, then seek to the beginning of that buffer, and finally use send_file to return the data with the correct mime-type.

from io import BytesIO

# Save it to a temporary buffer.
buf = BytesIO()
fig.savefig(buf, format="png")
buf.seek(0)
return send_file(buf, download_name="chart.png", mimetype="image/png")

You can see it all together in __init__.py, which also uses the APIFlask framework to parameterize and validate the routes.

Fast-loading Python Dev Containers

Since discovering Dev Containers and Github Codespaces a few months ago, I've become a wee bit of a addict. I love having an environment customized for each project, complete with all the tools and extensions, and with no concern for polluting the global namespace of my computer. However, there is one big drawback to loading a project in a Dev Container, whether locally in VS Code or online in Codespaces: it's slow! If the container isn't already created, it has to be built, and building a Docker container takes time.

So I want my Dev Containers to open fast, and pretty much all of mine are in Python. There are two ways I've used to build Python Dev Containers, and I now realize one is much faster than the other. Let's compare!

Python base image

Perhaps the most obvious approach is to use a Python-dedicated image, like Microsoft's Python devcontainer image. That just requires a Dockerfile like this one:

FROM --platform=amd64 mcr.microsoft.com/devcontainers/python:3.11

Universal container + python feature

However, there's another option: use a Python-less base image, like Microsoft's base devcontainer image and then add the "python" Feature on top. Features are a way to add common toolchains to a Dev Container, like for Python, Node.JS, Git, etc.

For this option, we start with the Dockerfile like this:

FROM --platform=amd64 mcr.microsoft.com/devcontainers/base:bullseye

And then, inside devcontainer.json, we add a "features" key and nest this feature definition inside:

"ghcr.io/devcontainers/features/python:1": {
    "version": "3.11"
}

Off to the races!

Which one of those options is better in terms of build time? You might already have a guess, but I wanted to get some empirical data behind my Dev Container decisions, so I compared the same project with the two options. For each run, I asked VS Code to build the container without a cache, and I recorded the resulting size and time from start to end of build. The results:

python image base + python feature
Base image size 1.29 GB 790.8 MB
Dev Container size 1.29 GB 1.62 GB
Time to build 12282 ms 94643 ms

The python image starts off larger than the base image (1.29 GB vs 790 MB), but after the build, the base+python container is larger at 1.62 GB. There's a huge difference in the time to build, with the python container building in 12,282ms while the base+python container requiring 8x as much time. So, features seem to take a lot of time to build. I'm not a Docker/Dev Container expert, so I won't attempt to explain why, but for now, I'll avoid features when possible. Perhaps the Dev Container team has plans for speeding up features in the future, so I'll keep my eyes peeled for updates on that front.

If you've been experimenting with Python Dev Containers as well and have learnings to share, let me know!

Hosting Python Web Apps on Azure: A Price-Off

When I started my job in June as a Microsoft Cloud Advocate for Python developers, one of my first goals was to port my old Google App Engine apps over to Azure. Those apps were doomed anyway, as they were using Python 2.7, so it was a great time to give them a make-over. I deploy most Azure samples to my corporate account, but I wanted to experience all the aspects of being an Azure developer, including the $$$, so I decided to host them on a personal Azure account instead. I also decided to deploy to a couple different hosting options, to see the differences.

The two apps:

  • pamelafox.org: My personal homepage, a Flask website that pulls data from a Google Spreadsheet (it's like a database, I swear!). It was previously on App Engine with memcached to cache the data pulls, so I ported it to Azure Container Apps with a CDN in front of the views.
  • translationtelephone.com: A game to translate a phrase between many languages. It was previously on App Engine with the default GAE database (BigTable-based), so I ported it to Azure App Service with a PostgreSQL Flexible Server.

Both of these are relatively low-traffic websites, so I would expect to pay very little for their hosting costs and for my traffic to be compatible with the cheaper SKUs of each Azure resource. Let's see how the costs have worked out for each of them.

Azure Container Apps + CDN

Here are the costs for January 2023, for all the resources involved in hosting pamelafox.org:

Azure resource SKU Monthly cost
Container Registry Basic $5.15
Azure Container Apps (No SKUs) $3.23
Content Delivery Network Microsoft CDN (Classic) $0.00

Perhaps surprisingly, the most expensive part is the Container Registry pricing. The least expensive SKU has a per-day pricing that can host up to 10 GB. My registry is storing only a single container that's only 0.33 GB, so I'm not maximizing that resource. If I had a few (or 30!) more container apps, I could re-use the same registry and share the cost.

The actual host, Azure Container Apps, is only $3.23, and that's likely helped by the Azure CDN in front. Azure Container Apps are priced according to usage (memory/vCPU), and the CDN means less usage of the ACA. The CDN cost only $0, which is my kind of number!

Azure App Service + PostgreSQL

Here are the costs for January 2023, for all the resources involved in hosting pamelafox.org:

Azure resource SKU Monthly cost
App Service Basic (B1) $12.11
DB for PostgreSQL Flexible Server Basic (B1MS) $0.00 (Free for now)

My costs for this website are higher due to App Service pricing per hour, regardless of requests/memory/CPU usage. For my region and currency, at the B1 tier, that's always around $12 per month. There is also a Free tier, but it doesn't support custom domains, so it's not an option for this site.

The PostgreSQL server is currently free for me, as I'm taking advantage of the first 12 months free. That only applies to one managed PostgreSQL server, any additional ones will cost me. Past the first year and first server, the cost would be ~$13 for the SKU and region I'm using.

Takeaways

Given the way that Azure Container Apps is priced, it seems like a better fit for my low-traffic websites, especially in conjunction with an aggressive CDN. I may port Translation Telephone over to ACA instead, to halve the costs there. However, I've actually already ported pamelafox.org to Azure Static Web Apps, which should be entirely free, since I've realized it's a bit of a waste to run a Flask app for a webpage that changes so infrequently. That's another great option for hobbyist websites.

If you're figuring our potential pricing for your Python apps on Azure, definitely read through the pricing pages, try the Azure pricing calculator, and make sure to set up a budget alert in your Azure account to remind you to continually monitor how much you're paying.

Monday, February 27, 2023

Testing APIFlask with schemathesis

When I asked developers on Mastodon "what framework do you use for building APIs?", the two most popular answers were FastAPI and Flask. So I set out building an API using Flask to see what the experience was like. I immediately found myself wanting a library like FastAPI to handle parameter validation for me, and I discovered APIFlask, a very similar framework that's still "100% compatible with the Flask ecosystem".


The Chart API

Using APIFlask, I wrote an API to generate Chart PNGs using matplotlib, with endpoints for both bar charts and pie charts. It could easily support many other kinds of charts, but I'll leave that as an exercise for the reader. 😉

API URLs on left side and Chart API output on right side

The following code defines the pie chart endpoint and schema:

class PieChartParams(Schema):
    title = String(required=False, validate=Length(0, 30))
    values = DelimitedList(Number, required=True)
    labels = DelimitedList(String)

@app.get("/charts/pie")
@app.input(PieChartParams, location="query")
def pie_chart(data: dict):
    fig = Figure()
    axes: Axes = fig.subplots(squeeze=False)[0][0]
    axes.pie(data["values"], labels=data.get("labels"))
    axes.set_title(data.get("title"))

    buf = BytesIO()
    fig.savefig(buf, format="png")
    buf.seek(0)
    return send_file(buf, download_name="chart.png", mimetype="image/png")

Using property-based testing

I like all my code to be fully tested, or at least, "fully" to my knowledge. I started off writing standard pytest unit tests for the endpoint (with much thanks to Github Copilot for filling in the tests). But I wasn't sure whether there were edge cases that I was missing, since my code wraps on top of matplotlib and I'm not a matplotlib expert.

What I wanted was property-based testing: automatically generated tests based on function parameter types, which make sure to include commonly missed edge cases (like negative numbers). In the past, I've used the hypothesis library for property-based testing. I wondered if there was a variant that was specially built for API frameworks, where the parameter types are declared in schemas, and lo-and-hold, I discovered that exact creature: schemathesis. It's built on top of hypothesis, and is perfect for FastAPI, APIFlask, or any similar framework.

The schemathesis library can be used from the command-line or inside pytest, using a fixture. I opted for the latter since I was already using pytest, and after reading their WSGI support docs, I came up with this file:

import pytest
import schemathesis
import hypothesis

from src import app

schema = schemathesis.from_wsgi("/openapi.json", app)

@schema.parametrize()
@hypothesis.settings(print_blob=True, report_multiple_bugs=False)
@pytest.mark.filterwarnings("ignore:Glyph:UserWarning")
def test_api(case):
    response = case.call_wsgi()
    case.validate_response(response)

There are a few additional lines in that file that you may not need: the hypothesis.settings fixture, and the pytest.mark.filterwarnings fixture. I added settings to increase the verbosity of the output, to help me replicate the issues, and I added filterwarnings to ignore the many glyph-related warnings coming out of matplotlib.

The API improvements

As a result of the schemathesis tests, I identified several parameters that could use additional validation.

I added both a min and max to the Number field in the values parameter:

values = DelimitedList(Number(validate=Range(min=0, max=3.4028235e38)), required=True)

I also added a custom validator for situations which couldn't be addressed with the built-in validators. The custom validator checks to make sure that the number of labels matches the number of values provided, and disallows a single value of 0.

@validates_schema
def validate_numbers(self, data, **kwargs):
    if "labels" in data and len(data["labels"]) != len(data["values"]):
        raise ValidationError("Labels must be specified for each value")
    if len(data["values"]) == 1 and data["values"][0] == 0:
        raise ValidationError("Cannot create a pie chart with single value of 0")

The full code can be seen in __init__.py.

I added specific tests for the custom validators to my unit tests, but I didn't do so for the built-in min/max validators, since I'm relying on the library's tests to ensure those work as expected.

Thanks to the property-based tests, users of this API will see a useful error instead of a 500 error. I'm a fan of property-based testing, and I hope to find ways to use it in future applications.

Wednesday, February 22, 2023

Managing Python dependency versions for web projects

Though I've worked on several production Python codebases, I've never been in charge of managing the dependencies. However, I now find myself developing many templates to help Python devs get started with web apps on Azure, and I want to set those up with best practices for dependency management. After discussing with my fellow Python advocates and asking on Mastodon, this seems to be the most commonly used approach:

  1. Pin all the production requirements for the web app. (Not necessary to pin development requirements, like linters.)
  2. Use a service like PyUp or Github Dependabot to notify you when a dependency can be upgraded.
  3. As long as tests all pass with the newest version, update to the new version. This assumes full test coverage, and as Brian Okken says, "you’re not testing enough, probably, test more." And if you really trust your tests, use a tool like Anthony Shaw's Dependa-lot-bot to auto-merge Github PRs when all checks pass.

I've now gone through and made that change in my web app templates, so here's what that looks like in an example repo Let's use flask-surveys-container-app, a containerized Flask app with a PostgreSQL database.


Pin the production requirements

My app already had a requirements.txt, but without any versions:

Flask
Flask-Migrate
Flask-SQLAlchemy
Flask-WTF
psycopg2
python-dotenv
SQLAlchemy
gunicorn
azure-keyvault-secrets
azure.identity

To figure out the current versions, I ran python3 -m pip freeze and copied the versions in:

Flask==2.2.3
Flask-Migrate==4.0.4
Flask-SQLAlchemy==3.0.3
Flask-WTF==1.1.1
psycopg2==2.9.5
python-dotenv==0.21.1
SQLAlchemy==2.0.4
gunicorn==20.1.0
azure-keyvault-secrets==4.6.0
azure-identity==1.12.0

Add Github dependabot

The first time that I set up Dependabot for a repo, I used the Github UI to automatically create the dependabot.yaml file inside the .github folder. After that, I copied the same file into every repo, since all my repos use the same options. Here's what the file looks like for an app that uses pip and stores requirements.txt in the root folder:

version: 2
updates:
  - package-ecosystem: "pip" # See documentation for possible values
    directory: "/" # Location of package manifests
    schedule:
      interval: "weekly"

If your project has a different setup, read through the Github docs to learn how to configure Dependabot.


Ensure the CI runs tests

For this system to work well, it really helps if there's an automated workflow that runs test and checks test coverage. Here's a snippet from the Python workflow file for the Flask app:

- name: Install dependencies
  run: |
    python -m pip install --upgrade pip
    pip install -r requirements-dev.txt
- name: Run Pytest tests
  run: pytest
  env:
    DBHOST: localhost
    DBUSER: postgres
    DBPASS: postgres
    DBNAME: postgres

To make sure the tests are actually testing the full codebase, I use coverage and make the tests fail if the coverage isn't high enough. Here's how I configure pyproject.toml to make that happen:

[tool.pytest.ini_options]
addopts = "-ra --cov"
testpaths = [
    "tests"
]
pythonpath = ['.']

[tool.coverage.report]
show_missing = true
fail_under = 100

Install Depend-a-lot-bot

Since I have quite a few Python web app repos (for Azure samples), I expect to soon see my inbox flooded with Dependabot pull requests. To help me manage them, I installed Dependa-lot-bot, which should auto-merge Github PRs when all checks pass.

I added .github/dependabot-bot.yaml file to tell the bot which packages are safe to merge:

safe:
 - Flask
 - Flask-Migrate
 - Flask-SQLAlchemy
 - Flask-WTF
 - psycopg2
 - python-dotenv
 - SQLAlchemy
 - gunicorn
 - azure-keyvault-secrets
 - azure-identity

Notably, that's every single package in this project's requirements, which may be a bit risky. Ideally, if my tests are comprehensive enough, they should notify me if there's an actual issue. If they don't, and an issue shows up in the deployed version, then that indicates my tests need to be improved.

I probably would not use this bot for a live website, like khanacademy.org, but it is helpful for the web app demo repos that I maintain.

So that's the process! Let me know if you have ideas for improvement or your own flavor of dependency management.

Monday, February 20, 2023

Loading multiple Python versions with Pyodide

As described in my last post, dis-this.com is an online tool for disassembling Python code. After I shared it last week in the Python forum, Guido asked if I could add a feature to switch Python versions, to see the difference in disassembly across versions. I was able to get it working for versions 3.9 - 3.11, but it was a little tricky due to the way Pyodide is designed.

I'm sharing my learnings here for anyone else building a similar tool in Pyodide.

Pyodide version ↔ Python version

Pyodide doesn't formally support multiple Python versions at once. The latest Pyodide version has the latest Python version that they've been able to support, as well as other architectural improvements. To get to older Python versions, you need to load older Pyodide versions that happened to support that version.

Here's a JS object mapping Python versions to Pyodide versions:

const versionMap = {
    '3.11': 'dev',
    '3.10': 'v0.22.1',
    '3.9': 'v0.19.1',
};

As you can see, 3.11 doesn't yet map to a numbered release version. According to the repository activity, v0.23 will be the numbered release once it's out. I will need to update that in the future.

Once I know what Python version the user wants, I append the script tag and call loadPyodide once loaded:

const scriptUrl = `https://cdn.jsdelivr.net/pyodide/${pyodideVersion}/full/pyodide.js`;
const script = document.createElement('script');
script.src = scriptUrl;
script.onload = async () => {
    pyodide = await loadPyodide({
        indexURL: `https://cdn.jsdelivr.net/pyodide/${pyodideVersion}/full/`,
        stdout: handleStdOut,
    });
    // Enable the UI for interaction
    button.removeAttribute('disabled');
};

Loading multiple Pyodide versions in same page

For dis-this, I want users to be able to change the Python version and see the disassembly in that different version. For example, they could start on 3.11 and then change to 3.10 to compare the output.

Originally, I attempted just calling the above code with the new Pyodide version. Unfortunately, that resulted in some funky errors. I figured it related to Pyodide leaking globals into the window object, so my next attempt was deleting those globals before loading a different Pyodide version. That actually worked a lot better, but still failed sometimes.

So, to be on the safe side, I made it so that changing the version number reloads the page. The website already supports encoding the state in the URL (via the permalink), so it wasn't actually too much work to add the "&version=" parameter to the URL and reload.

This code listens to the dropdown's change event and reloads the window to the new permalink:

document.getElementById('version-select').addEventListener('change', async () => {
    pythonVersion = document.getElementById('version-select').value;
    permalink.setAttribute('version', pythonVersion);
    window.location.search = permalink.path;
});

That permalink element is a Web Component that knows how to compute the correct path. Once the page reloads, this code grabs the version parameter from the URL:

wpythonVersion = new URLSearchParams(window.location.search).get('version') || '3.11';

The codebase for dis-this.com is relatively small, so you can also look through it yourself or fork it if you're creating a similar tool.

Tuesday, February 14, 2023

Dis This: Disassemble Python code online

When I was a lecturer at UC Berkeley teaching Python to thousands of students, I got asked all kinds of questions that got me digging deep into Python's innards. I soon discovered the dis module, which outputs the corresponding bytecode for a function or code segment. When students asked me the difference between various ways of writing the "same" code, I would often run the variations through the dis module to see if there was an underlying bytecode difference.

To see how dis works, consider this simple function:

def miles_to_km(miles):
    return miles * 1.609344

When we call dis.dis(miles_to_km), we see this output:

  1           0 RESUME                   0

  2           2 LOAD_FAST                0 (miles)
              4 LOAD_CONST               1 (1.609344)
              6 BINARY_OP                5 (*)
             10 RETURN_VALUE

The first (optional) number is the line number, then the offset, then the opcode name, then any opcode parameters, and optionally additional information to help interpret the parameters. I loved this output but found I was constantly trying to remember what each column represented and looking up the meaning of different op codes. I wanted to make disassembly more accessible for me and for others.

So I created dis-this.com, a website for disassembling Python code which includes an interactive hyperlinked output table plus the ability to permalink the output.

Screenshot of dis-this.com for miles_to_km example

The website uses Pyodide to execute the Python entirely in the browser, so that I don't have to run any backend or worry about executing arbitrary user code on a server. It also uses Lit for interactive elements, a library that wraps over Web Components, CodeMirror 6 for the editor, and RollUp for bundling up everything.

Since Pyodide has added support for 3.11 in its latest branch (not yet stable), the website optionally lets you enable the specializing adaptive interpreter. That's a new feature from the Faster CPython team that uses optimized bytecode operations for "hot" areas of code. If you check the box on dis-this.com, it will run the function 10 times and call dis.dis() with adaptive=True and show_caches=True.

For the example above, that results in a table with slightly different opcodes:

Screenshot of dis-this.com with miles_to_km example and specializing adaptive interpreter enabled

Try it out on some code and see for yourself! To learn more about the specializing adaptive interpreter, read the RealPython 3.11: New features article, PEP 659, or Python.org: What's New in Python 3.11.

Thursday, February 9, 2023

Writing a static maps API with FastAPI and Azure

As you may know if you've been reading my blog for a while, my first job in tech was in Google developer relations, working on the Google Maps API team. During my team there, we launched the Google Static Maps API. I loved that API because it offered a solution for developers who wanted a map, but didn't necessarily need the relatively heavy burden of an interactive map (with it's JavaScript and off-screen tiles).

Ever since using the py-staticmaps package to generate maps for my Country Capitals browser extension, I've been thinking about how fun it'd be to write an easily deployable Static Maps API as a code sample. I finally did it last week, using FastAPI along with Azure Functions and Azure CDN. You can fork the codebase here and deploy it yourself using the README instructions.

Screenshot with FastAPI documentation parameters on left and image map output on right

Here are some of the highlights from the sample.


Image responses in FastAPI

I've used FastAPI for a number of samples now, but only for JSON APIs, so I wasn't sure if it'd even work to respond with an image. Well, as I soon discovered, FastAPI supports many types of responses, and it worked beautifully, including the auto-generated Swagger documentation!

Here's the code for the API endpoint:


@router.get("/generate_map")
def generate_map(
    center: str = fastapi.Query(example="40.714728,-73.998672", regex=r"^-?\d+(\.\d+)?,-?\d+(\.\d+)?$"),
    zoom: int = fastapi.Query(example=12, ge=0, le=30),
    width: int = 400,
    height: int = 400,
    tile_provider: TileProvider = TileProvider.osm,
) -> fastapi.responses.Response:
    context = staticmaps.Context()
    context.set_tile_provider(staticmaps.default_tile_providers[tile_provider.value])
    center = center.split(",")
    center_ll = staticmaps.create_latlng(float(center[0]), float(center[1]))
    context.set_center(center_ll)
    context.set_zoom(zoom)

    # Render to PNG image and return
    image_pil = context.render_pillow(width, height)
    img_byte_arr = io.BytesIO()
    image_pil.save(img_byte_arr, format="PNG")
    return fastapi.responses.Response(img_byte_arr.getvalue(), media_type="image/png")

Notice how the code saves the PIL image into an io.BytesIO() object, and then returns it using the generic fastapi.responses.Response object with the appropriate content type.

Testing the image response

Writing the endpoint test took much longer, as I've never tested an Image API before and wasn't sure the best approach. I knew I needed to store a baseline image and check the generated image matched the baseline image, but what does it mean to "match"? My first approach was to check for exact equality of the bytes. That did work locally, but then failed when the tests ran on Github actions. Presumably, PIL saves images with slightly different bytes on the Github CI server than it does on my local machine. I switched to checking for a high enough degree of similarity using PIL.ImageChops, and that works everywhere:


def assert_image_equal(image1, image2):
    assert image1.size == image2.size
    assert image1.mode == image2.mode
    # Based on https://stackoverflow.com/a/55251080/1347623
    diff = PIL.ImageChops.difference(image1, image2).histogram()
    sq = (value * (i % 256) ** 2 for i, value in enumerate(diff))
    rms = math.sqrt(sum(sq) / float(image1.size[0] * image1.size[1]))
    assert rms < 90

def test_generate_map():
    client = fastapi.testclient.TestClient(fastapi_app)
    response = client.get("/generate_map?center=40.714728,-73.998672&zoom=12&width=400&height=400&tile_provider=osm")
    assert response.status_code == 200
    assert response.headers["content-type"] == "image/png"
    generated_image = PIL.Image.open(io.BytesIO(response.content))
    baseline_image = PIL.Image.open("tests/staticmap_example.png")
    assert_image_equal(generated_image, baseline_image)

I only tested a single baseline image, but in the future, it'd be easy to add additional tests for more API parameters and images.


Deploying to Azure

For deployment, I needed some sort of caching on the API responses, since most practical usages would reference the same image many times, plus the usage needs to adhere to the OpenStreetMap tile usage guidelines. I considered using either Azure API Management or Azure CDN. I went with the CDN mostly because I wanted to try it out, but API Management would also be a great choice, especially if you're interested in enabling more APIM policies.

All of my infrastructure is described declaratively in Bicep files in the infra/ folder, to make it easy for anyone to deploy the whole stack. This diagram shows what gets deployed:

Architecture diagram for CDN to Function App to FastAPI

Securing the function

Since I was putting a CDN in front of the Function, I wanted to prevent unauthorized access to the Function. Why expose myself to potential costly traffic on the Function's endpoint? The first step was changing function.json from an authLevel of "anonymous" to an authLevel of "function".


{
  "scriptFile": "__init__.py",
  "bindings": [
    {
      "authLevel": "function",
      ...

With that change, anyone hitting up the Function's endpoint without one of its keys gets served an HTTP 401. The next step was making sure the CDN passed on the key successfully. I set that up in the CDN endpoint's delivery rules, using a rule to rewrite request headers to include the "x-functions-key" header:


{
  name: 'Global'
  order: 0
  actions: [
    {
      name: 'ModifyRequestHeader'
      parameters: {
        headerAction: 'Overwrite'
        headerName: 'x-functions-key'
        value: listKeys('${functionApp.id}/host/default', '2019-08-01').functionKeys.default
        typeName: 'DeliveryRuleHeaderActionParameters'
      }
    }
  ]
}

Caching the API

In that same global CDN endpoint rule, I added an action to cache all the responses for 5 minutes:


    {
      name: 'CacheExpiration'
      parameters: {
          cacheBehavior: 'SetIfMissing'
          cacheType: 'All'
          cacheDuration: '00:05:00'
          typeName: 'DeliveryRuleCacheExpirationActionParameters'
      }
    }

That caching rule is really just for the documentation, however, as I also added a more specific rule to cache the images for a more aggressive 7 days:


{
  name: 'images'
  order: 1
  conditions: [
    {
      name: 'UrlPath'
      parameters: {
          operator: 'BeginsWith'
          negateCondition: false
          matchValues: [
            'generate_map/'
          ]
          transforms: ['Lowercase']
          typeName: 'DeliveryRuleUrlPathMatchConditionParameters'
      }
    }
  ]
  actions: [
    {
      name: 'CacheExpiration'
      parameters: {
          cacheBehavior: 'Override'
          cacheType: 'All'
          cacheDuration: '7.00:00:00'
          typeName: 'DeliveryRuleCacheExpirationActionParameters'
      }
    }
  ]
}

Check out the full CDN endpoint description in cdn-endpoint.bicep.

If you decide to use this Static Maps API in production, remember to adhere to the tile usage guidelines of the tile providers and minimize hitting up their server as much as possible. In the future, I'd love to spin up a full tile server on Azure, to avoid needing tile providers entirely. Next time!

.