Friday, December 29, 2023

Santa Tracker Tales: Nearly crashing Google's servers, Leaking Santa's data, and Angering an entire country

Back when I worked at Google, from 2006-2011, I spent many a December on my 20% project, the Santa Tracker. In those days, the tracker was a joint collaboration with NORAD, with the Googlers focused on making the map that showed Santa's journey across the world. I was brought in for my expertise with the Google Maps API (as my day job was Maps API advocacy), and our small team also included an engineer, an SRE, and a marketing director. It was a formative experience for me, since it was my first time working directly on a consumer-facing website. Here are the three incidents that stuck with me the most...

Nearly crashing Google's servers

Here's what the tracker map looked like:

Screenshot of Google map with Santa marker and presents

The marker is a Santa icon, it's positioned on top of his current location, and there's a sparkly trail showing his previous locations, so that families could see his trajectory.

We programmed the map so that Santa's moves were coordinated globally: we knew ahead of time when Santa should be in each location, and when the browser time ticked forward to a matching time, the Santa marker hopped to its next location. If 1 million people had the map open, they'd all see Santa move at the same time.

That hop was entirely coded in JavaScript, just a re-positioning of map markers, so it shouldn't have affected the Google servers, right? But our SRE was seeing massive spikes in the server's usage graphs every 5 minutes, during Santa's hops, and was very concerned the servers wouldn't be able to handle increased traffic once the rest of the world tuned in (Santa always started in Australia/Japan and moved west).

So what could cause those spikes? We thought at first it could be the map tiles, since some movements could pan the map enough to load in more tiles... but our map was fairly zoomed out, and most nearby tiles would have been loaded in already.

It was the sparkly trail! My brilliant addition for that year was about to crash Google's servers. The trail was a collection of multiple animated GIFs, and due to the way I'd coded it, the browser made a new img tag for each of them on each hop. And, as you may have guessed by now, there were no caching headers on those GIFs, and no CDN hosting them. Every open map was making six separate HTTP requests at the exact same time. Eek!

Our SRE quickly added in caching headers, so that the browsers would store the images after initial page load, and the Google servers were happy again.

Lesson learned: Always audit your cache headers!

Leaking Santa's data

How did the map know which location Santa should visit next? Well, if a 4 year old is reading this, it sent a request to Santa's sleigh's GPS. For the rest of you, I'll reveal the amazing technology backing the map: a Google spreadsheet.

We coordinated everything via a spreadsheet, and even used scripts inside the sheet to verify the optimal ordering of locations. We needed Santa to visit each of the locations before 10 pm in the local time zone, since one of goals of the tracker is to help parents get kids to bed by showing them that Santa's on his way. That meant a lot of zig zagging north to south, and some back and forth zig zagging to accomodate for time zone differences across countries.

We published that spreadsheet, so that the webpage could fetch its JSON feed. I think there were some years that we converted the spreadsheet to a straight JSON object in a js file, but there was at least one year where we fetched the sheet directly. That gave us the advantage of being able to easily update the data for users loading the map later.

We worried a bit that someone would see the spreadsheet and publish the locations, spoiling the surprise for fellow map watchers, but would someone really want to ruin the magic of Xmas like that?

Yes, yes, they would! We discovered somehow (perhaps via a Google alert) that a developer had written a blog post in Japanese describing their discovery of Santa's future locations in a neatly tabulated format. Fortunately, the post attracted little attention, at least in the English-speaking news that we could see.

Lesson learned: Security by obscurity doesn't work if your code and network requests can be easily viewed.

Angering an entire country with my ignorance

This is the most embarrassing, so please try to forgive me.

Background: I grew up in Syracuse, New York. I have fond memories of taking road trips with my family to see Niagara Falls in Toronto. The falls were breathtaking every time.

Fast forward 15 years: I'd been monitoring the map for 20 hours by the time Santa made it to the Americas, so I was pretty tired. I spent a lot of those hours responding to emails sent to Santa, mostly from adorable kids with their wishlists, but also a few from parents troubleshooting map issues. I loved answering those emails as PamElfa, my elf persona.

Suddenly, after Santa hopped to Toronto, we got a flood of angry emails. Why, they rightly wanted to know, did the info window popup say "Toronto, US" instead of "Toronto, CA"?

Oops. I had apparently managed to become a full-grown adult without realizing that Toronto is in an entirely different country. I hadn't remembered border crossing in my memories, so I had come to think that Toronto was in New York, or that at least half of it was. (How would that even work?? Sigh.)

I fixed that row in the data, but thousands had already seen the error of my ways, so I spent hours sending apology emails to justifiably upset Canadians (many of whom were quite kind about my mistake). So sorry, again, Canada!

Lesson learned: Double-check geopolitical data, especially when it comes to what cities belong to what countries.

Thursday, December 28, 2023

How to document a native California garden

Ever since moving into our house in 2021 in the East Bay area, I’ve been replacing the exotic and invasive plants with native California plants, preferring pollinator-friendly keystone species in particular.

Our garden will be part of a native gardens tour in 2024, and one of the requirements is to clearly label the native plants. I considered many label options (like marker-on-plastic or laser etched wood) but I really wanted a highly informative sign. Fortunately, Calscape.org includes a feature for printing out signs for each native California plant species, so I decided to put laminated Calscape signs around the garden. Here’s what a finished sign looks like:

Photo of a laminated plant sign on a landscape staple

If you’d like to make similar signs for your native California garden, you can follow the guide below. If your garden is in another state, you’ll need to find a similar source for signs or make them yourself.


Supplies

For convenience, I’ve linked each supply to the product I purchased on Amazon, but many products would work similarly.


Steps

  1. Make a spreadsheet of the native plants in your garden, with columns for common name and latin name. You might also want to note where you sourced the plant from and where you planted it.
  2. For each row, look up the plant on Calscape.org and add the URL to the sheet. If the entry doesn’t yet have a photo, you can add one yourself by joining the site and editing the page. Spreadsheet of plants
  3. While you have the plant page open, scroll down and select “Print plant sign”. Save it as a local PDF file or immediately print it.
  4. Print each sign on a sheet of heavyweight paper.
  5. Cut each sign on the bottom, and top as needed, so that it will fit inside pouch. The Calscape signs have variable height, so the amount of cutting required varies as well.
  6. For more rigidity, stack the sign on top of the bottom half of the paper that you cut off. Insert stack into a laminating pouch.
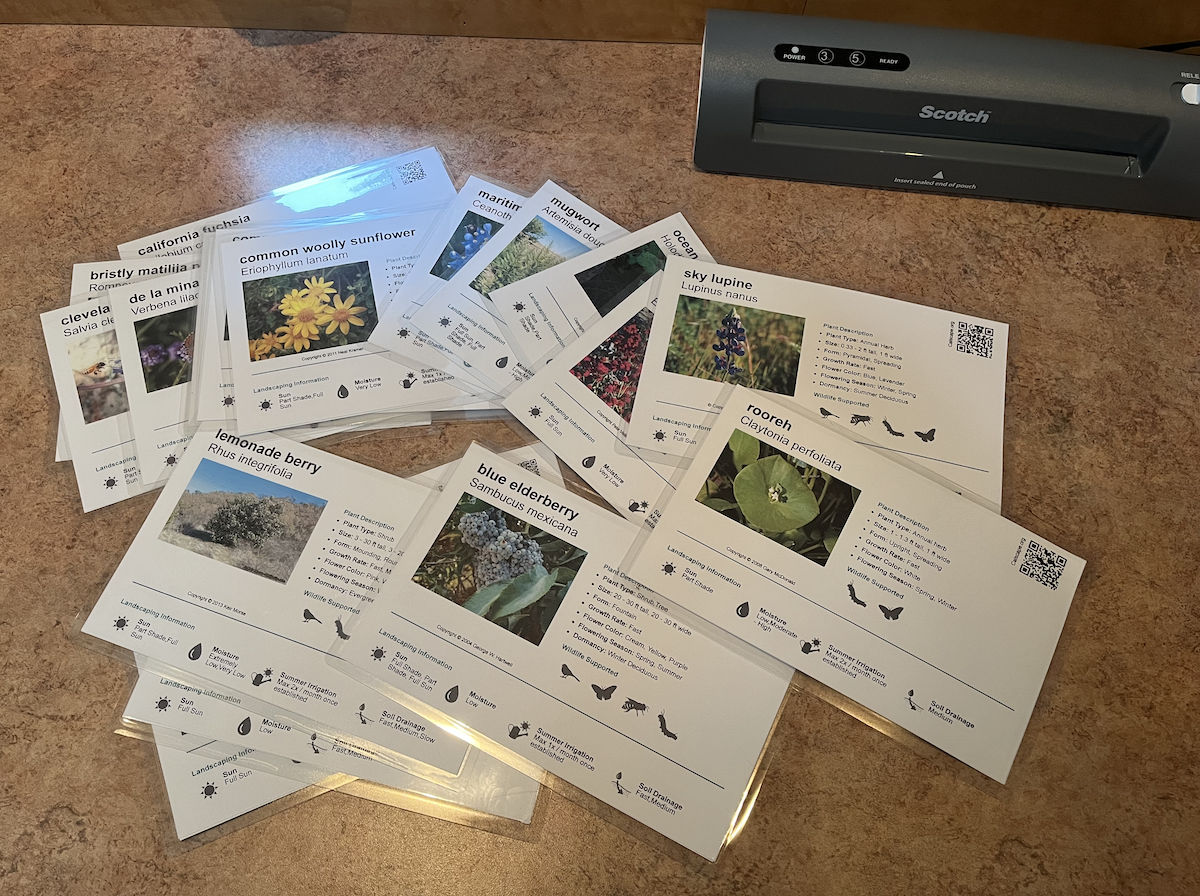
  7. Send pouch through laminating machine, and let it cool down for a few minutes. Laminator next to many laminated signs
  8. Take a landscape staple and bend the top, using either a vise or a hard countertop. A hand bending a staple over a countertop
  9. Attach sign to staple using shipping tape. The back of a laminated sign next to a roll of tape and staple
  10. Stick signs in the ground. 🎉 Photo of laminated plant signs in garden

Considerations

  • Sign size: These are fairly large signs, so they’ll stand out from afar and may encroach on plant space. I will probably also experiment with the small “plant label” option on Calscape, which only has the name and QR code. The small version seems especially helpful for labeling annual flowers that can pop up all over the place.
  • Sign color: One of the reasons the signs stand out so much is the bright white paper. I may try a cream colored paper instead, if I can find a heavyweight option, but I worry about the effect on the flower photos in each sign (especially for white flowers).
  • Weather: My first batch of signs have survived a rainstorm, so that’s promising. It remains to be seen how they will handle a full rainy season, and how much they’ll fade from repeated UV exposure. I assume I will have to remake them at some point, which is why I invested in the printer/laminator versus using a print shop.
  • Customizability: I would love to indicate plant source (seed company or nursery) but that’s not possible with the generic Calscape signs. I might end up adding small labels for the tour.

Tuesday, December 19, 2023

My failed attempt at using a closet as an office

My partner and I both work from home. I'm very thankful for that as we have two young children and a commute would take up the same time we spend on getting them ready for the day. However, it's been quite a journey coming up with a home office setup that works for both of us.

We're fortunate that our 2-bedroom house in the bay area is fairly roomy - large living room, large bedroom, and a large addition to the house that looks very much like it was designed to be an office.

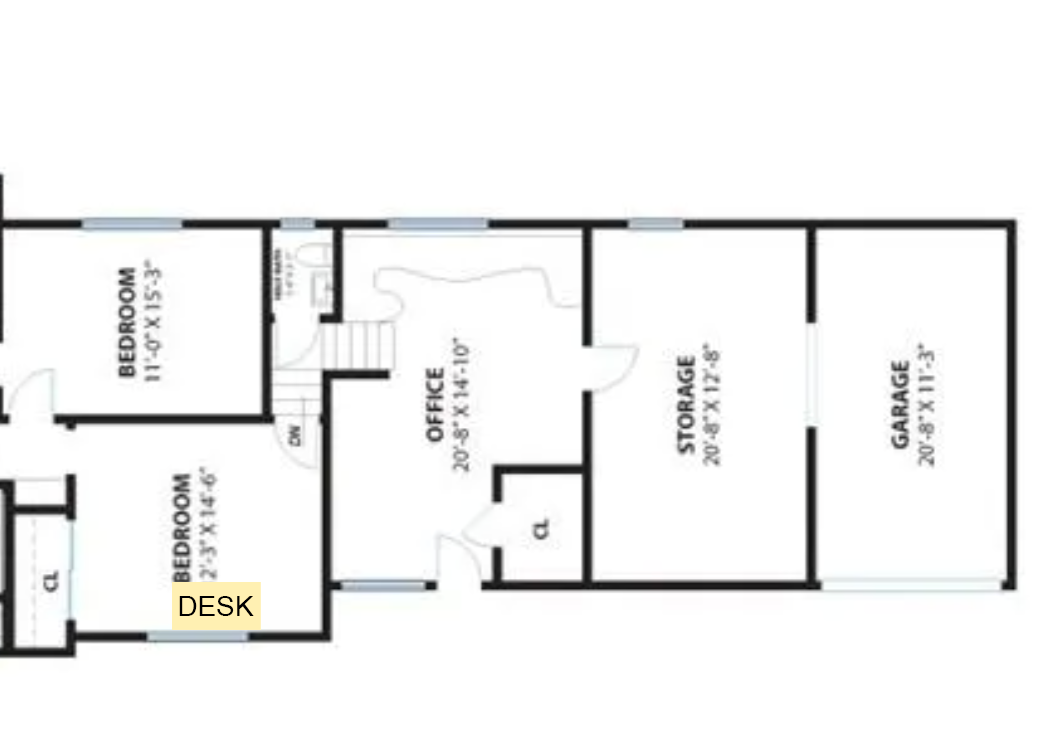
Here's the layout:

Blueprint of 2-bedroom house

Office #1: Built-in desk

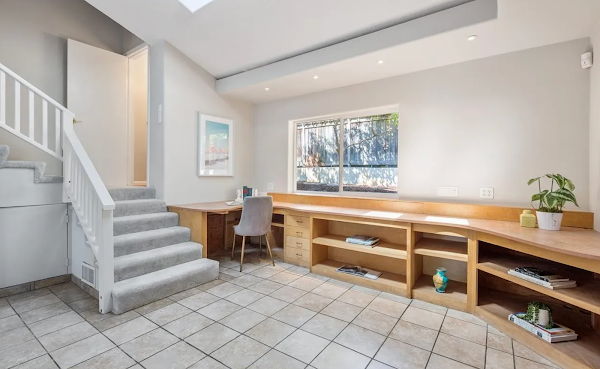
The first obvious candidate for a home office was the "office" area, which even has a built-in desk. See how perfect it looks from the realtor's photos?

Photo of office with built-in desk

Which of us should take that? I'm often doing live streaming or video recording, so I need good lighting, good backdrop, and a high likelihood of people not moving through the space. I realized that desk wasn't a good fit for me, as it lacked all those things, so my partner put his multi-monitor setup there and has been quite happy with it since.


Office #2: Window desk

My next idea was to put a desk next to the window on the sunny side of the office and put a room divider behind me.

Blueprint showing desk next to window in office area

I tried this for a few days but realized that my partner's days are chock full of meetings, and I was constantly distracted by his fairly loud voice or I was constantly distracting him with my own loud voice. Even with our noise-cancelling headphones, we were too loud to be in the same air space, and were both convinced that the other one was definitely the loudest. I feared our relationship could not survive such a setup! 😤


Office #3: Closet desk

Our downstairs office area has a small room that was likely intended as an office, but is surprisingly well accessorized: a strip of very bright adjustable lights on the ceiling, multiple power outlets, and even a door. I decided I would attempt to use that closet as my office, and hoped that the door/wall would muffle the sound sufficiently.

Blueprint showing desk inside closet in office area

And thus begins a long, expensive, and ultimately futile adventure in trying to make a closet into something it's not...


Acoustic treatment

My first goal was to improve the room's acoustic characteristics, as small rooms suffer from bad audio due to reflections on the walls/corners. This involved:

Photo of purple and pink sound panels on wall behind a monitor

Soundproofing

My next goal was to reduce the sound from my partner. This is notably a *distinct* goal from the first one, as this has to do with how waves travel through the walls, not how they travel within the walls. This involved:

  • Moving a bookcase against one of the external walls (mass reduces sound waves)
  • Attaching acoustic tiles to the door
  • Giving up on those tiles, hiring contractor to replace hollow core door with solid core door (most internal doors are hollow core for cost reasons, but solid core is much better for sound reduction)
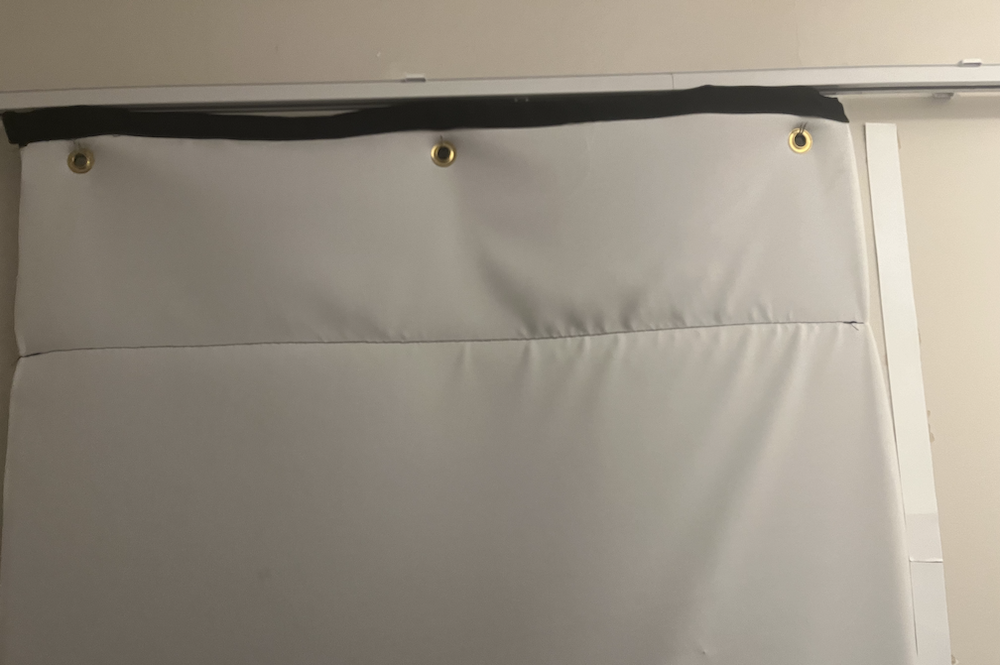
  • Hanging an acoustic curtain in front of the door, on a curtain track so I could move it in front of door during meetings
  • Affixing magnetic strips around the door frame and sewing magnetic buttons onto that acoustic curtain, so that I could try to seal it around the door during meetings. (I never managed to achieve a tight seal, however).
Photo of acoustic curtain on a curtain track in front of door

Ultimately, I achieved a pretty high level of sound reduction, enough so that I could at least stream and attendees didn't seem to notice disruptive background sound. I could still hear my partner in recordings, so I tried to only do recordings when he wasn't in meetings (which was rare!), or I did post-processing to remove noise.


Lighting

The best lighting is actual daylight in front of you, not overhead office lights. So I tried...

  • Replacing the existing office lights with very warm toned lights
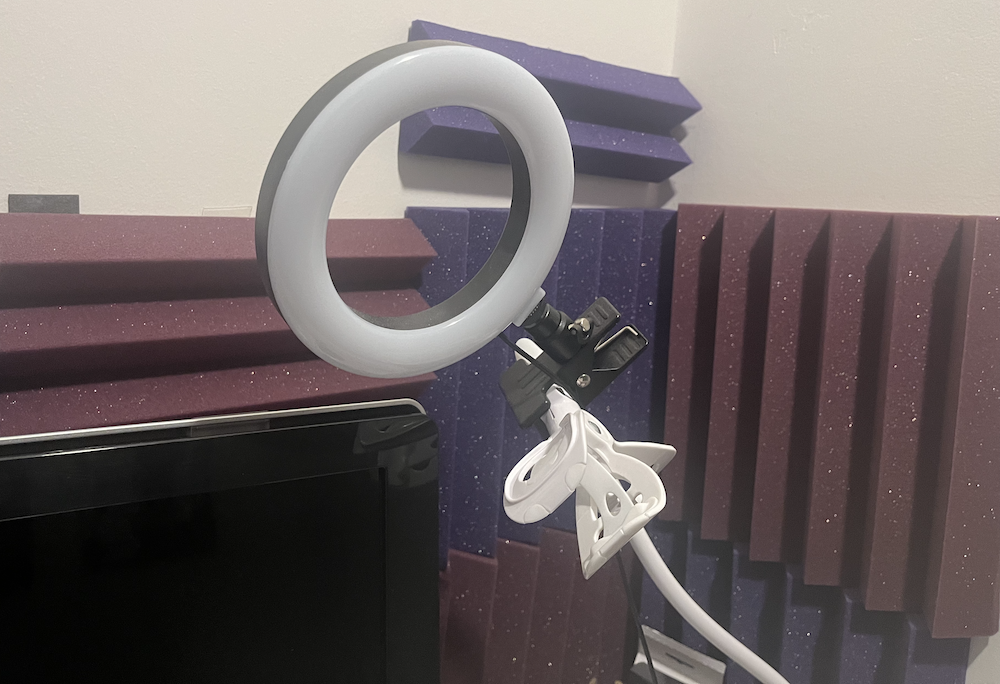
  • Positioning a ring light using an adjustable arm
  • Buying Camo studio so I could more easily use my iPhone as a camera (better quality than most webcams)
  • Buying a wall mount holder to hold the iPhone at the right spot above my monitor
  • Buying LED lights for a little glow behind me
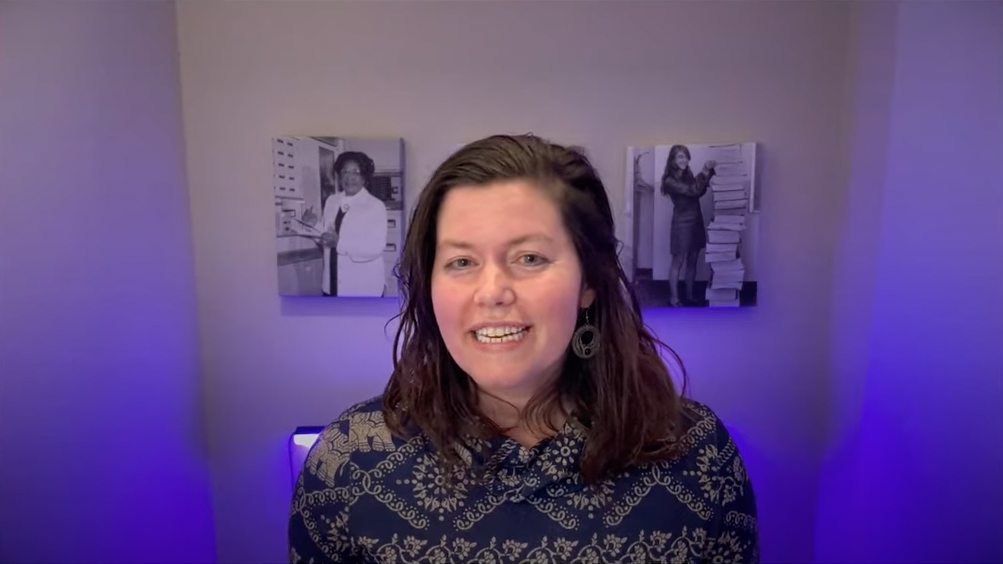
  • Hanging up canvas prints of famous women in STEM (printed at Walgreens photos) so that my backdrop wasn't just a dull gray
Photo of ring light Photo of iPhone wall mount

That improved my lighting to acceptable levels, I think, but you can judge for yourself by watching a video recorded with the lighting setup or checking the screenshot below.

Photo of Pamela in front of a purple-hued wall

Air quality management

As I myself started attending more meetings and doing longer streams, I started to worry about the air quality in my little office. Was I getting enough oxygen? Was I unintentionally decreasing my brain's ability to think? I first installed an Airthings air quality monitor to discover that my CO2 levels were indeed getting pretty high for meetings over an hour (1500+). Improving the air quality consisted of...

  • Hiring a contractor to install a grill in the office wall abutting the storage room and affixing a shelf to a wall in that storage room, so that fresh air could flow in.
  • Hiring same contractor to fix the window in that storage room so that I could keep the window open with a screen on all day without inviting the local wildlife in as well.
  • Buying a remote-controlled fan to forcibly blow the air in from the storage room when I could see my CO2 levels getting high.
Photo of ventilation grill in wall Photo of fan on shelf outside ventilation grill

That setup did actually work, and I was able to pull off a 6-hour live stream in my little closet, with decent CO2 levels throughout the stream. It was annoying to try to remember to open the window at start of the day and close it end of the day, so usually I'd just remember once a week to open the windows to freshen up the air in the storage room.


Temperature control

That closet had no particular means of temperature control like the rest of our house, and neither did the storage room beyond the grill. In the winter, I stayed comfortable enough by using a space heater at the start of the day while monitoring the air quality in case it increased VOCs (which it didn't seem to).

But then summer started. And oh wow, it got pretty hot (high 70s) in that little room, even with the fan, and I found it affected my ability to function well in meetings. We had also recently upgraded to a heat pump system in the rest of the house, complete with air conditioning, and I found myself fantasizing of a well conditioned office.


Office #4: Bedroom

After all that, this is the point where I finally decided that the closet-office just wasn't meant to be. I had already spent thousands upgrading it -- did I really want to spend thousands more fixing the temperature issues?

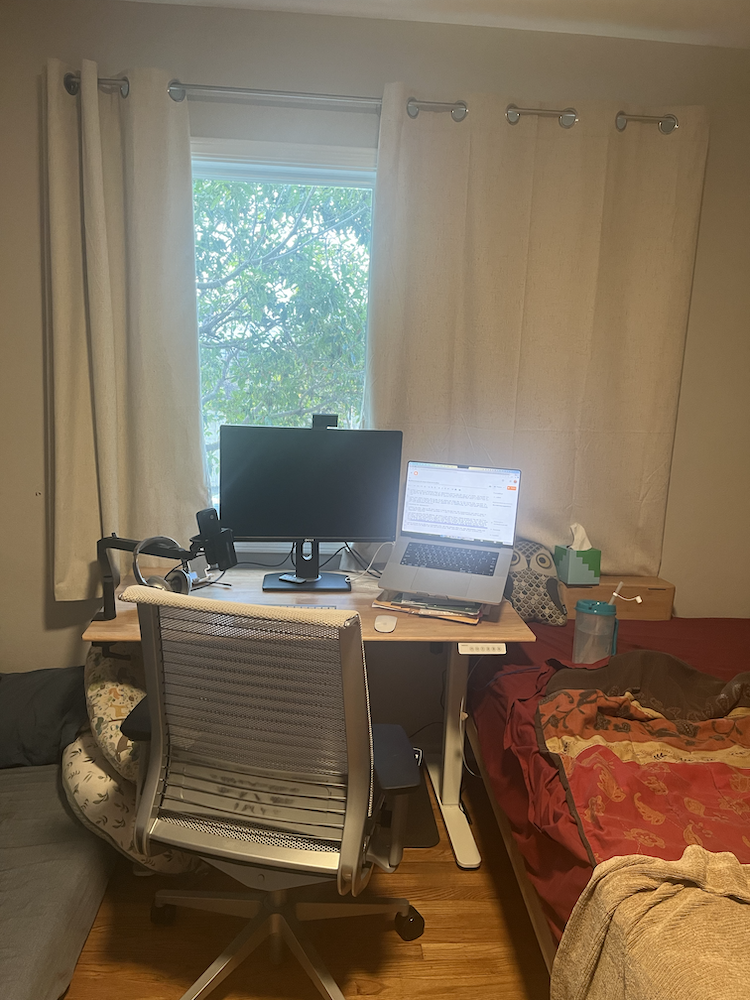
I moved upstairs into our bedroom, and setup a tiny office there, wedged between our bed and the floor bed that I share with our toddler.

Blueprint showing desk in bedroom Photo of desk wedged between two beds

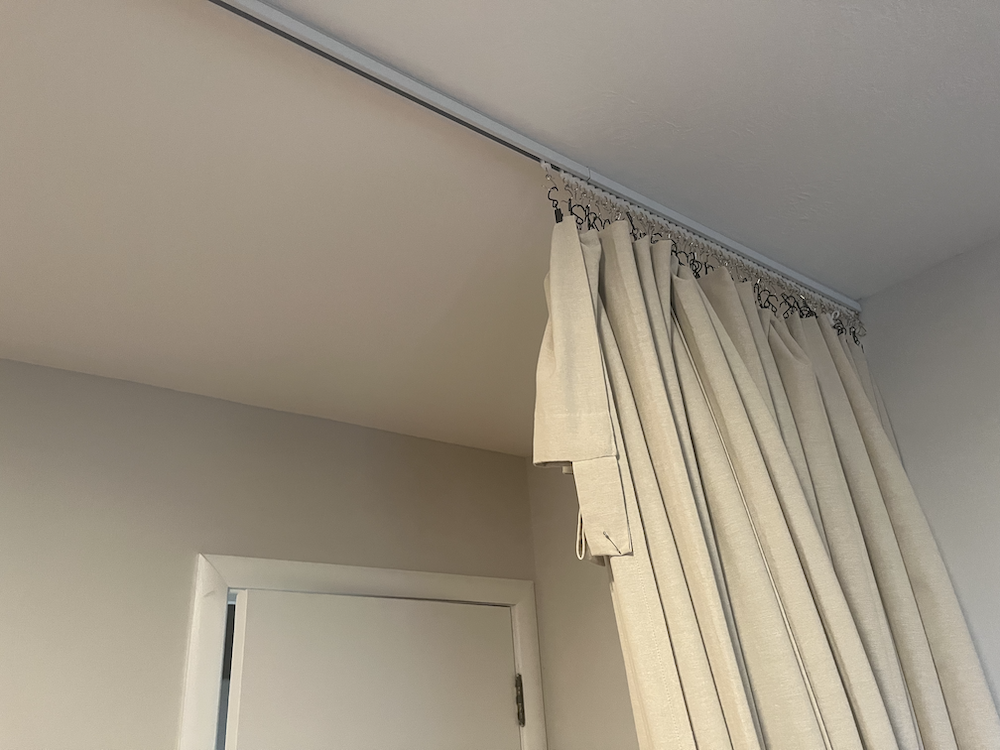
To avoid my partner showing up on streams when he walks past me, I put up a curtain on a track (a wider version of the track used in the closet-office), and I start off each day by moving my curtain into place.

Photo of linen curtain on a ceiling curtain track

I reduce sound by closing the door and keeping my toddler's noise machine on during the day. As it turns out, just being on a different level helps a lot in reducing sound. I still struggle to make recordings without hearing my partner in the background, but it's basically the same level as it was inside the fully upgraded closet. Sigh!

I've written up my tale as a cautionary tale, but also because there are some improvements I made that may legitimately be helpful for your own office setup. TLDR: sometimes a closet is just a closet.