Showing posts with label devcontainer. Show all posts

Wednesday, November 27, 2024

Running Azurite inside a Dev Container

I recently worked on an improvement to the flask-admin extension to upgrade the Azure Blob Storage SDK from v2 (an old legacy SDK) to v12 (the latest). To make it easy for me to test out the change without touching a production Blob storage account, I used the Azurite server, the official local emulator. I could have installed that emulator on my Mac, but I was already working in GitHub Codespaces, so I wanted Azurite to be automatically set up inside that environment, for me and any future developers. I decided to create a dev container definition for the flask-admin repository, and used that to bring in Azurite.

To make it easy for *anyone* to make a dev container with Azurite, I've created a GitHub repository whose sole purpose is to set up Azurite:
https://github.com/pamelafox/azurite-python-playground

You can open that up in a GitHub Codespace or VS Code Dev Container immediately and start playing with it, or continue reading to learn how it works.

devcontainer.json

The entry point for a dev container is .devcontainer/devcontainer.json, which tells the IDE how to set up the containerized environment.

For a container with Azurite, here's the devcontainer.json:

{
  "name": "azurite-python-playground",
  "dockerComposeFile": "docker-compose.yaml",
  "service": "app",
  "workspaceFolder": "/workspace",
  "forwardPorts": [10000, 10001],
  "portsAttributes": {
    "10000": {"label": "Azurite Blob Storage Emulator", "onAutoForward": "silent"},
    "10001": {"label": "Azurite Blob Storage Emulator HTTPS", "onAutoForward": "silent"}
  },
  "customizations": {
    "vscode": {
      "settings": {
        "python.defaultInterpreterPath": "/usr/local/bin/python"
      }
    }
  },
  "remoteUser": "vscode"
}

That dev container tells the IDE to build a container using docker-compose.yaml and to treat the "app" service as the main container for the editor to open. It also tells the IDE to forward the two ports exposed by Azurite (10000 for HTTP, 10001 for HTTPS) and to label them in the "Ports" tab. That's not strictly necessary, but it's a nice way to see that the server is running.

docker-compose.yaml

The docker-compose.yaml file needs to describe first the "app" container that will be used for the IDE's editing environment, and then define the "azurite" container for the local Azurite server.

version: '3'

services:
  app:
    build:
      context: .
      dockerfile: Dockerfile

    volumes:
      - ..:/workspace:cached

    # Overrides default command so things don't shut down after the process ends.
    command: sleep infinity
    environment:
      AZURE_STORAGE_CONNECTION_STRING: DefaultEndpointsProtocol=http;AccountName=devstoreaccount1;AccountKey=Eby8vdM02xNOcqFlqUwJPLlmEtlCDXJ1OUzFT50uSRZ6IFsuFq2UVErCz4I6tq/K1SZFPTOtr/KBHBeksoGMGw==;BlobEndpoint=http://127.0.0.1:10000/devstoreaccount1;

  azurite:
    container_name: azurite
    image: mcr.microsoft.com/azure-storage/azurite:latest
    restart: unless-stopped
    volumes:
      - azurite-data:/data
    network_mode: service:app

volumes:
  azurite-data:

A few things to note:

  • The "app" service is based on a local Dockerfile with a base Python image. It also sets the AZURE_STORAGE_CONNECTION_STRING for connecting with the local server.
  • The "azurite" service is based off the official azurite image and uses a volume for data persistance.
  • The "azurite" service uses network_mode: service:app so that it is on the same network as the "app" service. This means that the app can access them at a localhost URL. The other approach is to use network_mode: bridge, the default, which would mean the Azurite service was only available at its service name, like "http://azurite:10000". Either approach works, as long as the connection string is set correctly.

Dockerfile

The Dockerfile defines the environment for the code editing experience. In this case, I am bringing in a devcontainer-optimized Python image. You could adapt it for other languages, like Java, .NET, JavaScript, Go, etc.

FROM mcr.microsoft.com/devcontainers/python:3.12

pip install -r requirements.txt

Monday, November 25, 2024

Making a dev container with multiple data services

A dev container is a specification that describes how to open up a project in VS Code, GitHub Codespaces, or any other IDE supporting dev containers, in a consistent and repeatable manner. It builds on Docker and docker-compose, and also allows for IDE settings like extensions and settings. These days, I always try to add a .devcontainer/ folder to my GitHub templates, so that developers can open them up quickly and get the full environment set up for them.

In the past, I've made dev containers to bring in PostgreSQL, pgvector, and Redis, but I'd never made a dev container that could bring in multiple data services at the same time. I finally made a multi-service dev container today, as part of a pull request to flask-admin, so I'm sharing my approach here.

devcontainer.json

The entry point for a dev container is devcontainer.json, which tells the IDE to use a particular Dockerfile, docker-compose, or public image. Here's what it looks like for the multi-service container:

{
  "name": "Multi-service dev container",
  "dockerComposeFile": "docker-compose.yaml",
  "service": "app",
  "workspaceFolder": "/workspace"
}

That dev container tells the IDE to build a container using docker-compose.yaml and to treat the "app" service as the main container for the editor to open.

docker-compose.yaml

The docker-compose.yaml file needs to describe first the "app" container that will be used for the IDE's editing environment, and then describe any additional services. Here's what one looks like for a Python app bringing in PostgreSQL, Azurite, and MongoDB:

version: '3'

services:
  app:
    build:
      context: .
      dockerfile: Dockerfile
      args:
        IMAGE: python:3.12

    volumes:
      - ..:/workspace:cached

    # Overrides default command so things don't shut down after the process ends.
    command: sleep infinity
    environment:
      AZURE_STORAGE_CONNECTION_STRING: DefaultEndpointsProtocol=http;AccountName=devstoreaccount1;AccountKey=Eby8vdM02xNOcqFlqUwJPLlmEtlCDXJ1OUzFT50uSRZ6IFsuFq2UVErCz4I6tq/K1SZFPTOtr/KBHBeksoGMGw==;BlobEndpoint=http://127.0.0.1:10000/devstoreaccount1;
      POSTGRES_HOST: localhost
      POSTGRES_PASSWORD: postgres
      MONGODB_HOST: localhost

  postgres:
    image: postgis/postgis:16-3.4
    restart: unless-stopped
    environment:
      POSTGRES_PASSWORD: postgres
      POSTGRES_DB: flask_admin_test
    volumes:
      - postgres-data:/var/lib/postgresql/data
    network_mode: service:app

  azurite:
    container_name: azurite
    image: mcr.microsoft.com/azure-storage/azurite:latest
    restart: unless-stopped
    volumes:
      - azurite-data:/data
    network_mode: service:app

  mongo:
    image: mongo:5.0.14-focal
    restart: unless-stopped
    network_mode: service:app

volumes:
  postgres-data:
  azurite-data:

A few things to point out:

  • The "app" service is based on a local Dockerfile with a base Python image. It also sets environment variables for connecting to the subsequent services.
  • The "postgres" service is based off the official postgis image. The postgres or pgvector image would also work there. It specifies environment variables matching those used by the "app" service. It sets up a volume so that the data can persist inside the container.
  • The "azurite" service is based off the official azurite image, and also uses a volume for data persistance.
  • The "mongo service" is based off the official mongo image, and in this case, I did not set up a volume for it.
  • Each of the data services uses network_mode: service:app so that they are on the same network as the "app" service. This means that the app can access them at a localhost URL. The other approach is to use network_mode: bridge, the default, which would mean the services were only available at their service names, like "http://postgres:5432" or "http://azurite:10000". Either approach works, as long as your app code knows how to find the service ports.

Dockerfile

Any of the services can be defined with a Dockerfile, but the example above only uses a Dockerfile for the default "app" service, shown below:

ARG IMAGE=bullseye
FROM mcr.microsoft.com/devcontainers/${IMAGE}

RUN apt-get update && export DEBIAN_FRONTEND=noninteractive \
    && apt-get -y install --no-install-recommends postgresql-client \
     && apt-get clean -y && rm -rf /var/lib/apt/lists/*

That file brings in a devcontainer-optimized Python image, and then goes on to install the psql client for interaction with the PostgreSQL database. You can also install other tools here, plus install Python requirements. It just depends on what you want to be available in the environment, versus what commands you want developers to be running themselves.

Friday, June 2, 2023

Providing feedback on the VS Code Python experience

My current role as a Python cloud advocate at Microsoft is to make sure Python developers have a great experience using Microsoft products, including my current favorite IDE, VS Code. As much as I love VS Code, it still has bugs (all software does!), so I often find myself filing issues. It can be a little tricky to figure out where to file issues, as there are multiple GitHub repos involved, so I'm writing this post to help others figure out what to post where.

github.com/microsoft/vscode
The primary VS Code repo. This is typically not the place for Python-specific issues, but if your feedback doesn't fit anywhere else, this might be where it goes, and the triagers can direct you elsewhere if needed.
github.com/orgs/community/discussions/categories/codespaces
Discussion forum for issues that seem specific to GitHub Codespaces (e.g. forwarded ports not opening).
github.com/microsoft/vscode-remote-release
Similarly, this is the repo for the VS Code Dev Containers extension, appropriate for issues that only happen when opening a project in a Dev Container locally.
github.com/devcontainers/images
The repo that generates the mcr.microsoft.com/devcontainers Docker images. If you're using a Dev Container with a Python image from that registry and think the issue stems from the image, report it here. Consult the README first, however.
github.com/microsoft/vscode-python
The repo for the Python extension that's responsible for much of the Python-specific experience. The extension does build upon various open-source projects, however. See below.
github.com/microsoft/pylance-release
The repo for the library that provides the linting/error reports in VS Code. When you get squiggles in your Python code in VS Code and hover over them, you should see in the popup whether the error comes from Pylance or a different extension. If you haven't installed any other extensions besides the Python one, then it's almost certainly from Pylance.
github.com/microsoft/debugpy
The repo for the library that provides part of the Python debugger experience in VS Code. For example, if it's not showing local variables correctly in the debug sidebar, that's an issue for debugpy.
github.com/microsoft/vscode-jupyter
The repo for the Jupyter extension that makes ipynb notebooks work well in VS Code. This extension used to be downloaded along with the Python extension but must now be installed separately. If it's a notebook-specific issue, it probably goes here.

Whenever you're filing an issue, be sure to provide as much information as possible. Thanks for helping us make the Python experience better!

Monday, May 22, 2023

A Dev Container for SQLAlchemy with SQLTools

SQLAlchemy 2.0 was recently released, with a few significant interface differences. I'm working on a video that walks through a SQLAlchemy 2.0 example, and in the process of making that video, I created a Dev Container optimized for SQLAlchemy + SQLite + SQLTools.

You can get the Dev Container here (or try it in Codespaces first!):
github.com/pamelafox/sqlalchemy-sqlite-playground


Dev Container contents

The devcontainer.json includes:

  • A base image of mcr.microsoft.com/devcontainers/python:3.11
  • Python linting extensions:
    "ms-python.python",
    "ms-python.vscode-pylance",
    "charliermarsh.ruff"
        
  • SQLTools extension and SQLite driver:
    "mtxr.sqltools",
    "mtxr.sqltools-driver-sqlite"
  • The node feature (necessary for the SQLTools SQLite driver)
  • A related setting necessary for SQLite driver:
    "sqltools.useNodeRuntime": true,
  • Preset connection for a SQLite DB stored in my_database.db file:
    "sqltools.connections": [
      {
        "previewLimit": 50,
        "driver": "SQLite",
        "name": "database",
        "database": "my_database.db"
       }],
  • A post-create command that installs SQLAlchemy and Faker:
    python3 -m pip install -r requirements.txt

Besides the .devcontainer folder and requirements.txt, the repository also contains example.py, a file with SQLAlchemy 2.0 example code.


Using the Dev Container

  1. Open the project in either GitHub Codespaces or VS Code with the Dev Containers extension. As part of starting up, it will auto-install the requirements and SQLTools will detect node is already installed: Screenshot of VS Code terminal after installing pip requirements, with pop-up about node being detected
  2. Run example.py: Screenshot of python file with cursor on run icon in top left
  3. Select the SQLTools icon in the sidebar: Screenshot of VS Code sidebar with cursor over SQLTools icon
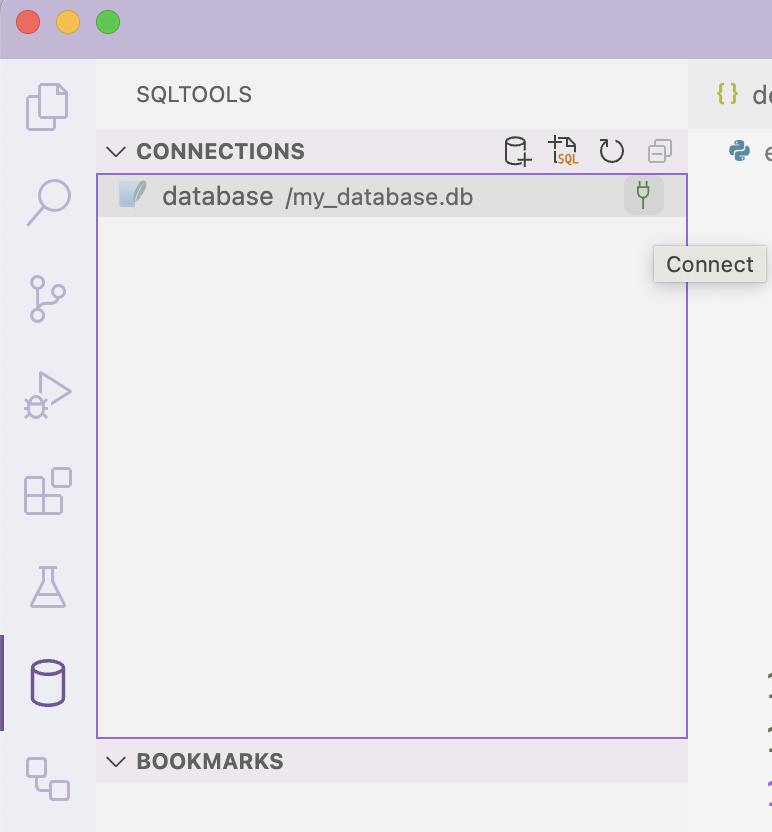
  4. Next to the preset connection, select the connect icon (a plug): Screenshot of VS Code sidebar with SQLTools extension open, cursor on right side of database connection
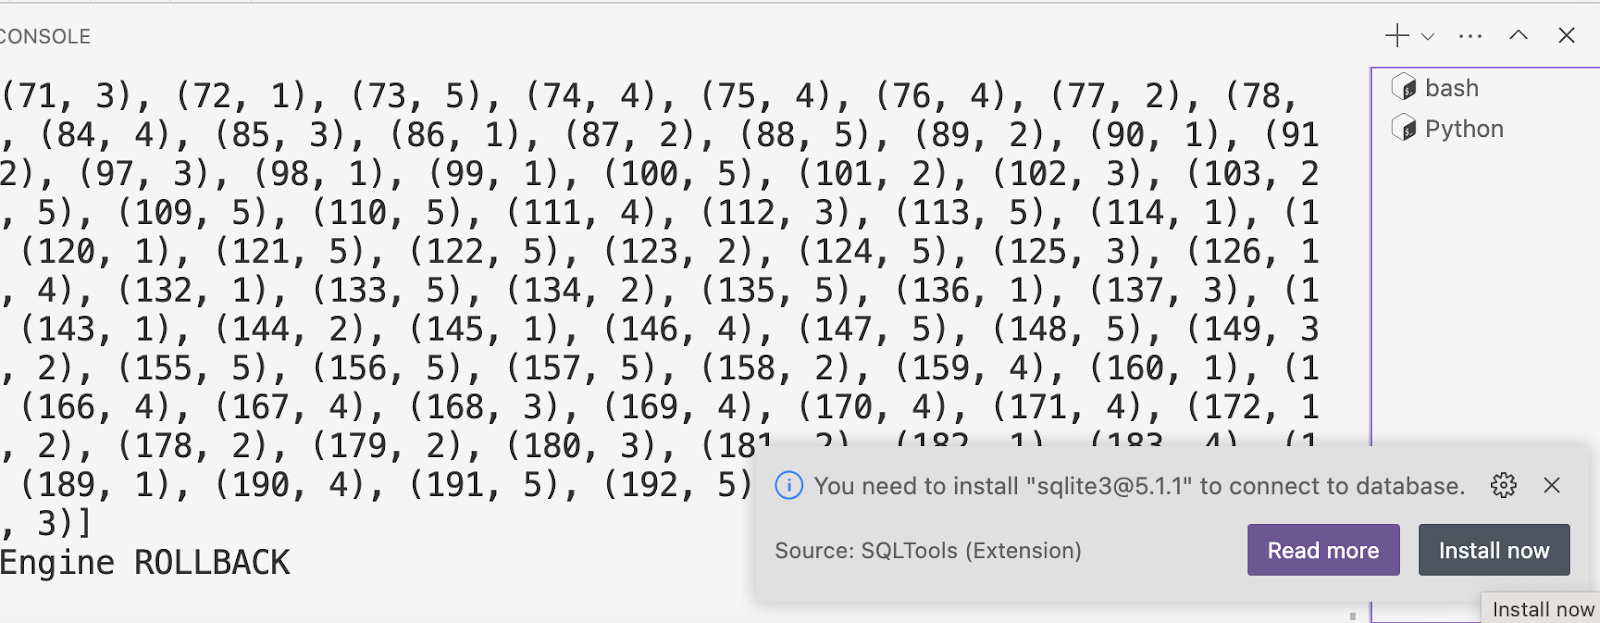
  5. When it prompts you to install the sqlite npm package, select Install now: Screenshot of VS Code terminal with prompt from SQLTools about installing sqlite package
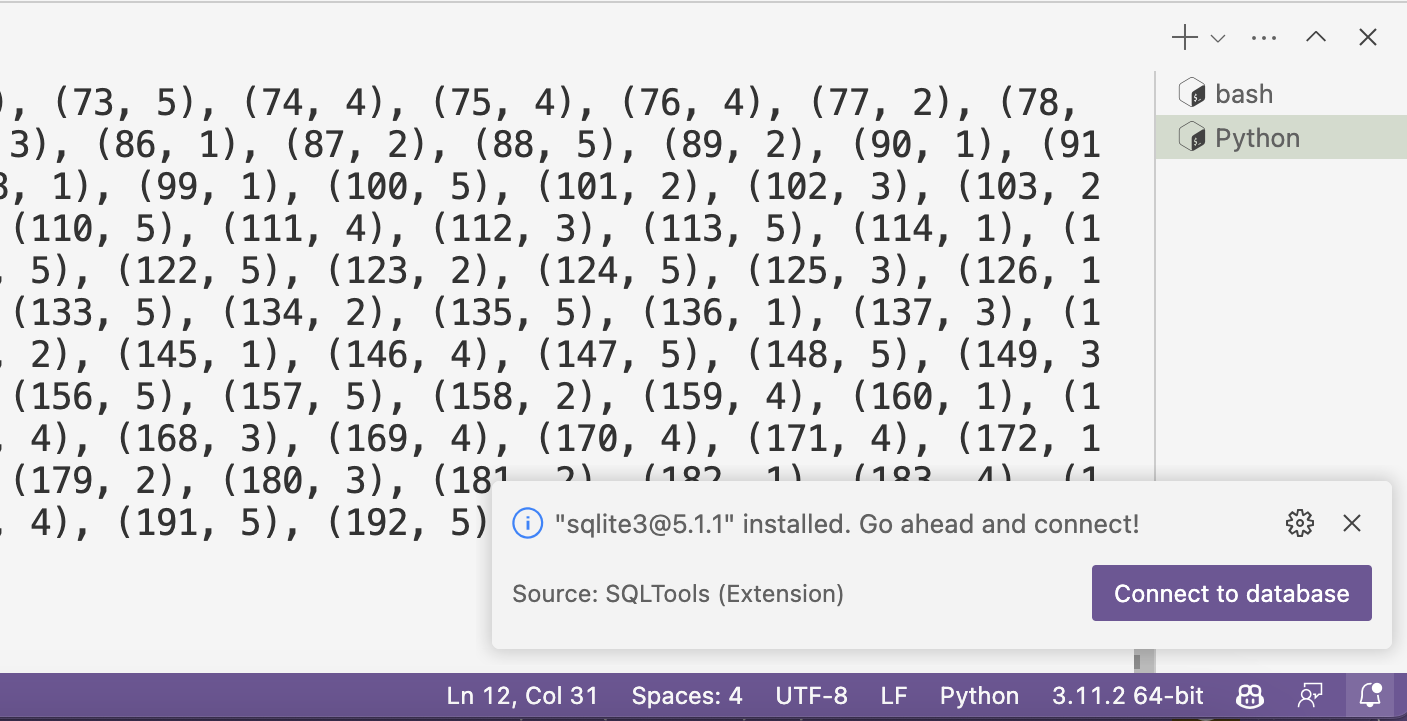
  6. When it's done installing, select Connect to database. Screenshot of VS Code with prompt from SQLTools about sqlite successful installation
  7. Browse the table rows by selecting the magnifying glass next to teach table. Screenshot from SQLTools VS Code extension with customers table open and rows of generated data

Thursday, March 2, 2023

Fast-loading Python Dev Containers

Since discovering Dev Containers and Github Codespaces a few months ago, I've become a wee bit of a addict. I love having an environment customized for each project, complete with all the tools and extensions, and with no concern for polluting the global namespace of my computer. However, there is one big drawback to loading a project in a Dev Container, whether locally in VS Code or online in Codespaces: it's slow! If the container isn't already created, it has to be built, and building a Docker container takes time.

So I want my Dev Containers to open fast, and pretty much all of mine are in Python. There are two ways I've used to build Python Dev Containers, and I now realize one is much faster than the other. Let's compare!

Python base image

Perhaps the most obvious approach is to use a Python-dedicated image, like Microsoft's Python devcontainer image. That just requires a Dockerfile like this one:

FROM --platform=amd64 mcr.microsoft.com/devcontainers/python:3.11

Universal container + python feature

However, there's another option: use a Python-less base image, like Microsoft's base devcontainer image and then add the "python" Feature on top. Features are a way to add common toolchains to a Dev Container, like for Python, Node.JS, Git, etc.

For this option, we start with the Dockerfile like this:

FROM --platform=amd64 mcr.microsoft.com/devcontainers/base:bullseye

And then, inside devcontainer.json, we add a "features" key and nest this feature definition inside:

"ghcr.io/devcontainers/features/python:1": {
    "version": "3.11"
}

Off to the races!

Which one of those options is better in terms of build time? You might already have a guess, but I wanted to get some empirical data behind my Dev Container decisions, so I compared the same project with the two options. For each run, I asked VS Code to build the container without a cache, and I recorded the resulting size and time from start to end of build. The results:

python image base + python feature
Base image size 1.29 GB 790.8 MB
Dev Container size 1.29 GB 1.62 GB
Time to build 12282 ms 94643 ms

The python image starts off larger than the base image (1.29 GB vs 790 MB), but after the build, the base+python container is larger at 1.62 GB. There's a huge difference in the time to build, with the python container building in 12,282ms while the base+python container requiring 8x as much time. So, features seem to take a lot of time to build. I'm not a Docker/Dev Container expert, so I won't attempt to explain why, but for now, I'll avoid features when possible. Perhaps the Dev Container team has plans for speeding up features in the future, so I'll keep my eyes peeled for updates on that front.

If you've been experimenting with Python Dev Containers as well and have learnings to share, let me know!